Gokyo Lake Trek -11 Days
The Gokyo Lake Trek offers an unforgettable journey through the Nepalese Himalayas, showcasing stunning mountain views, glaciers, and the tranquil Gokyo Lakes. It's a quieter alternative to the Everest Base Camp trek, providing a peaceful experience amidst breathtaking scenery.
Trek Region
Everest
Difficulty
Moderate
Start/End
Kathmandu
Transportation
Flight
Max Altitude
5,364m
Guide
Provided
Meals
Provided
Trip Code
GLT-11
Best Season
Mar-May, Sep-Nov
Accommodation
Tea House / Lounge
Activities
Trekking & Hiking
Trek Highlights
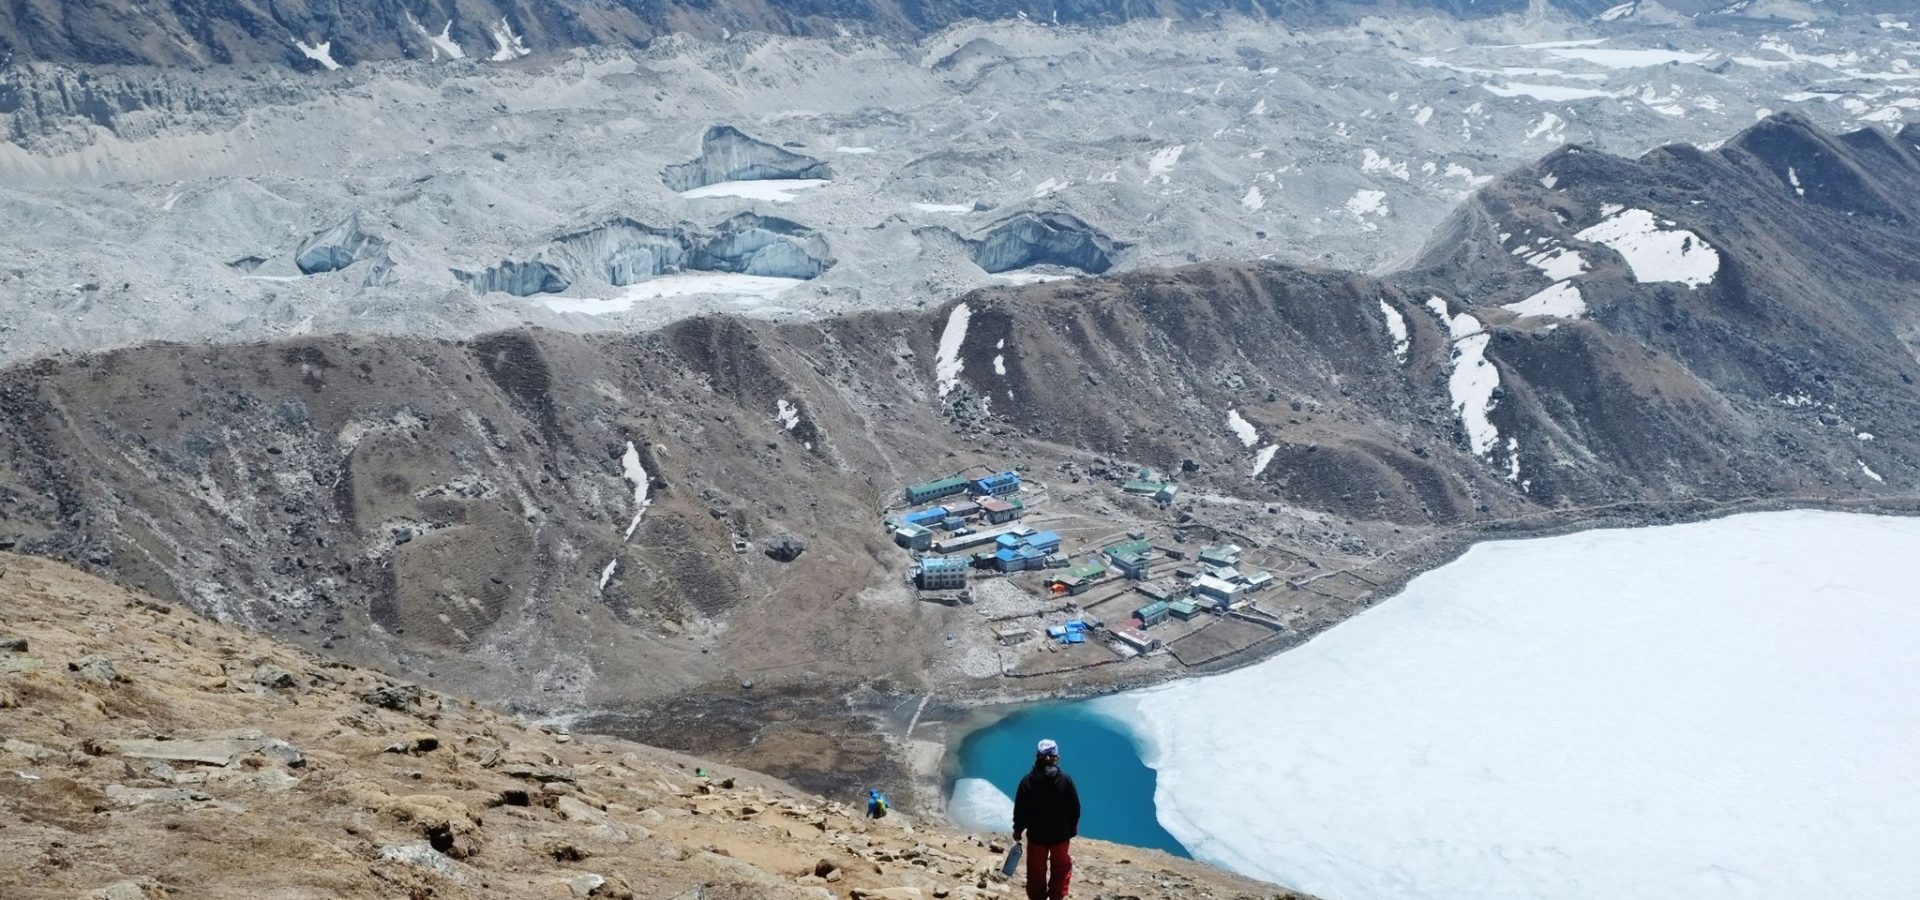
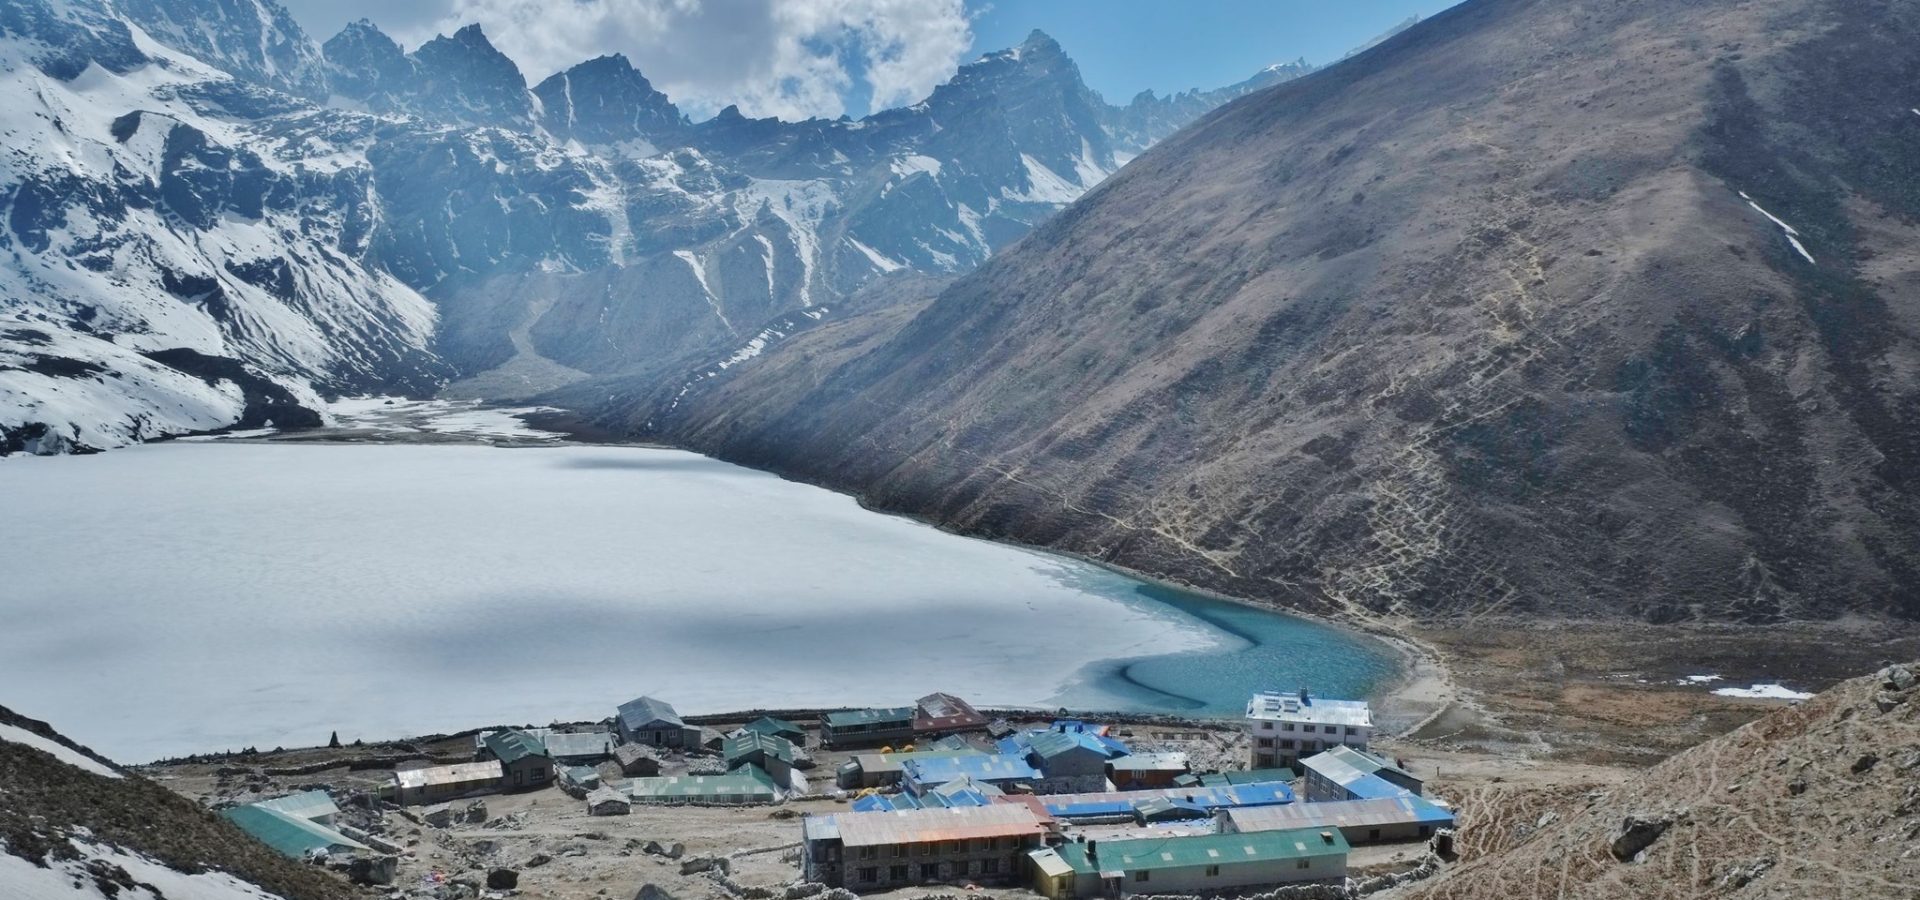
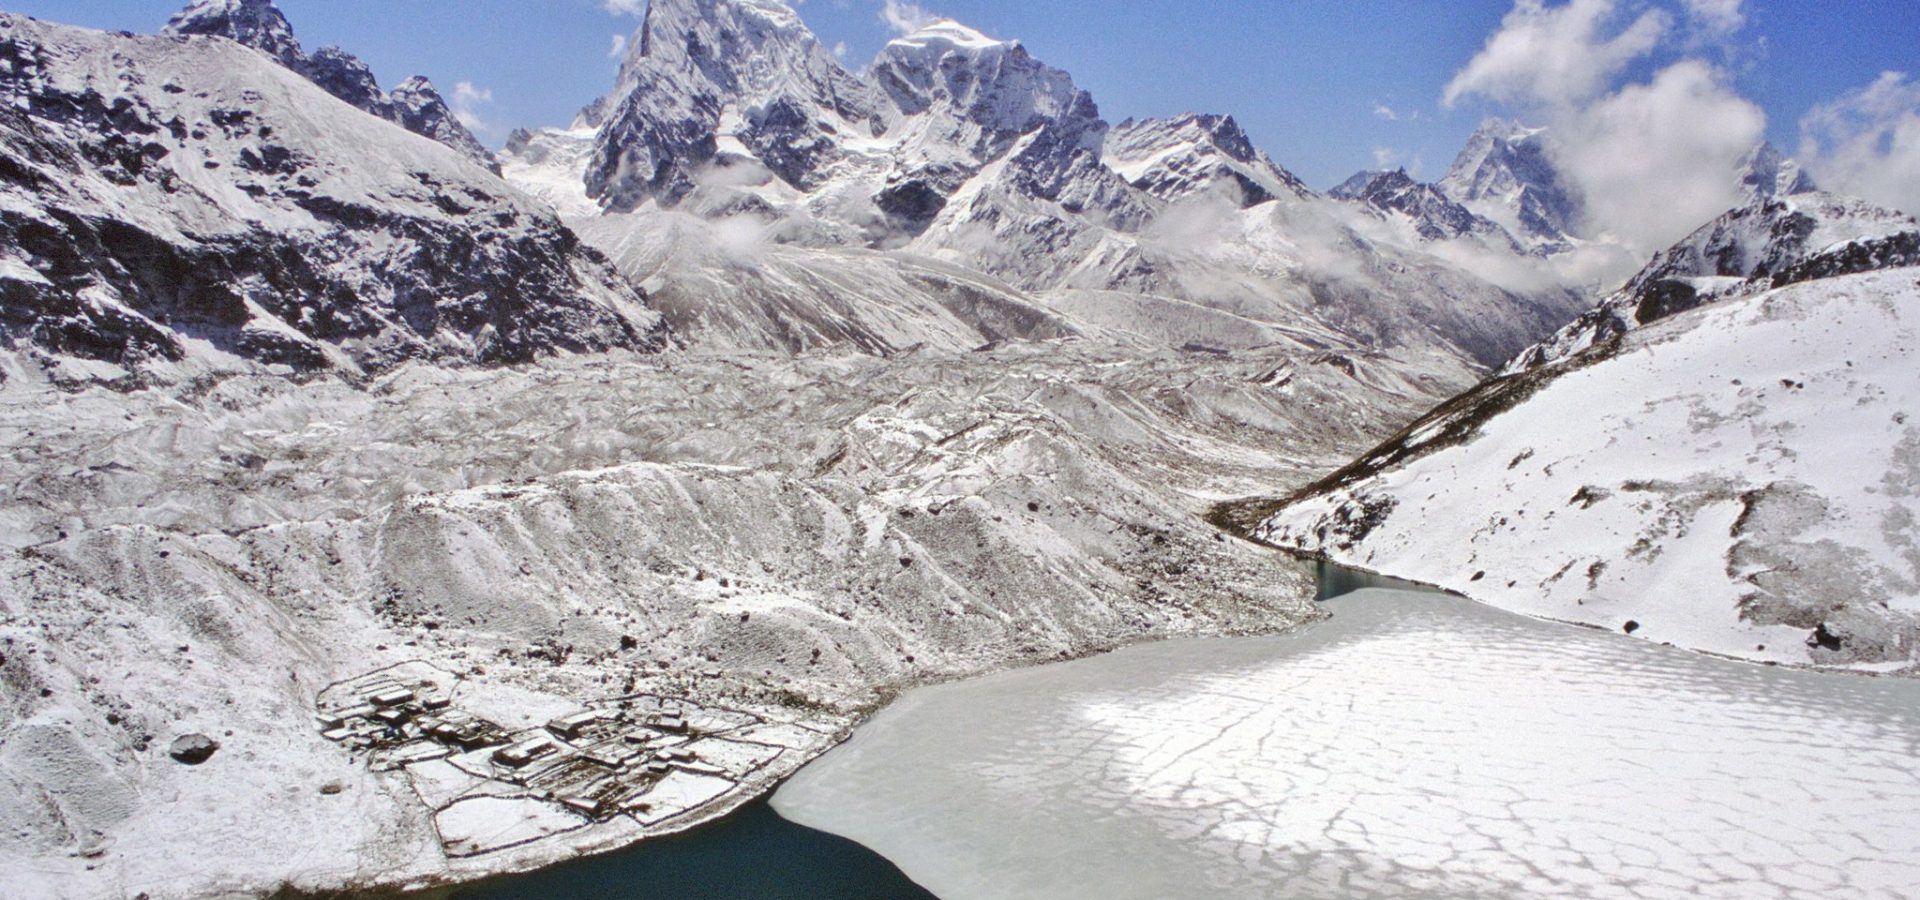
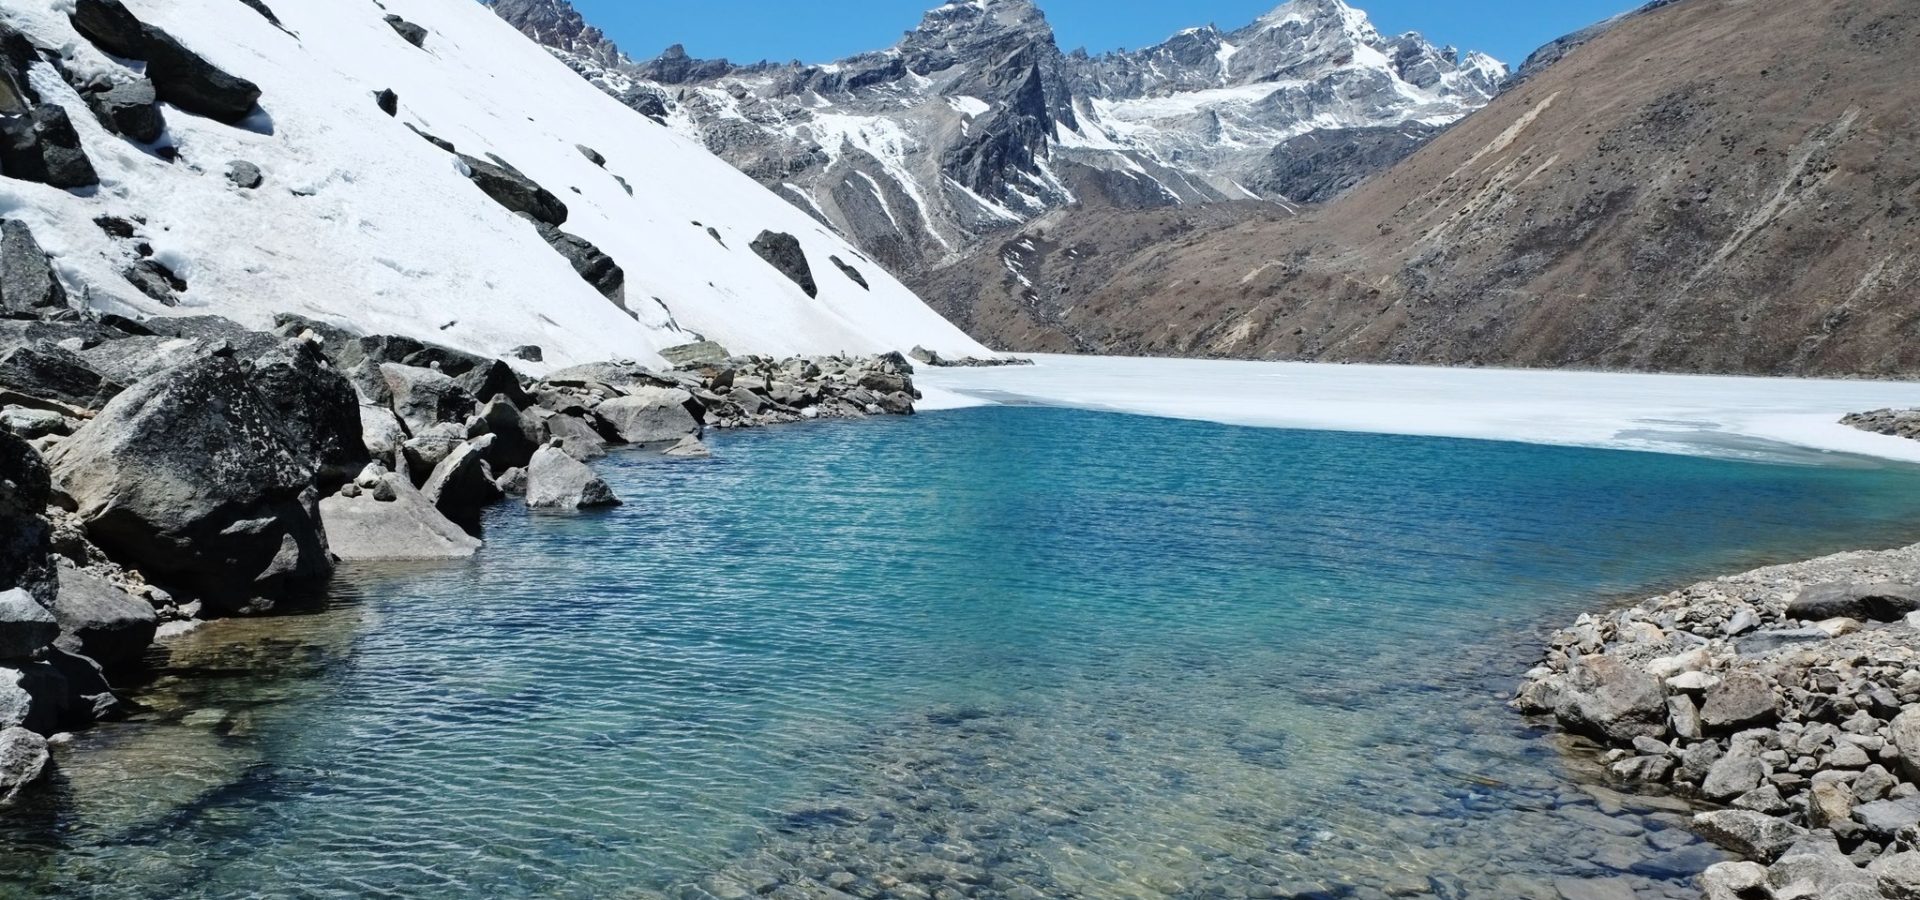
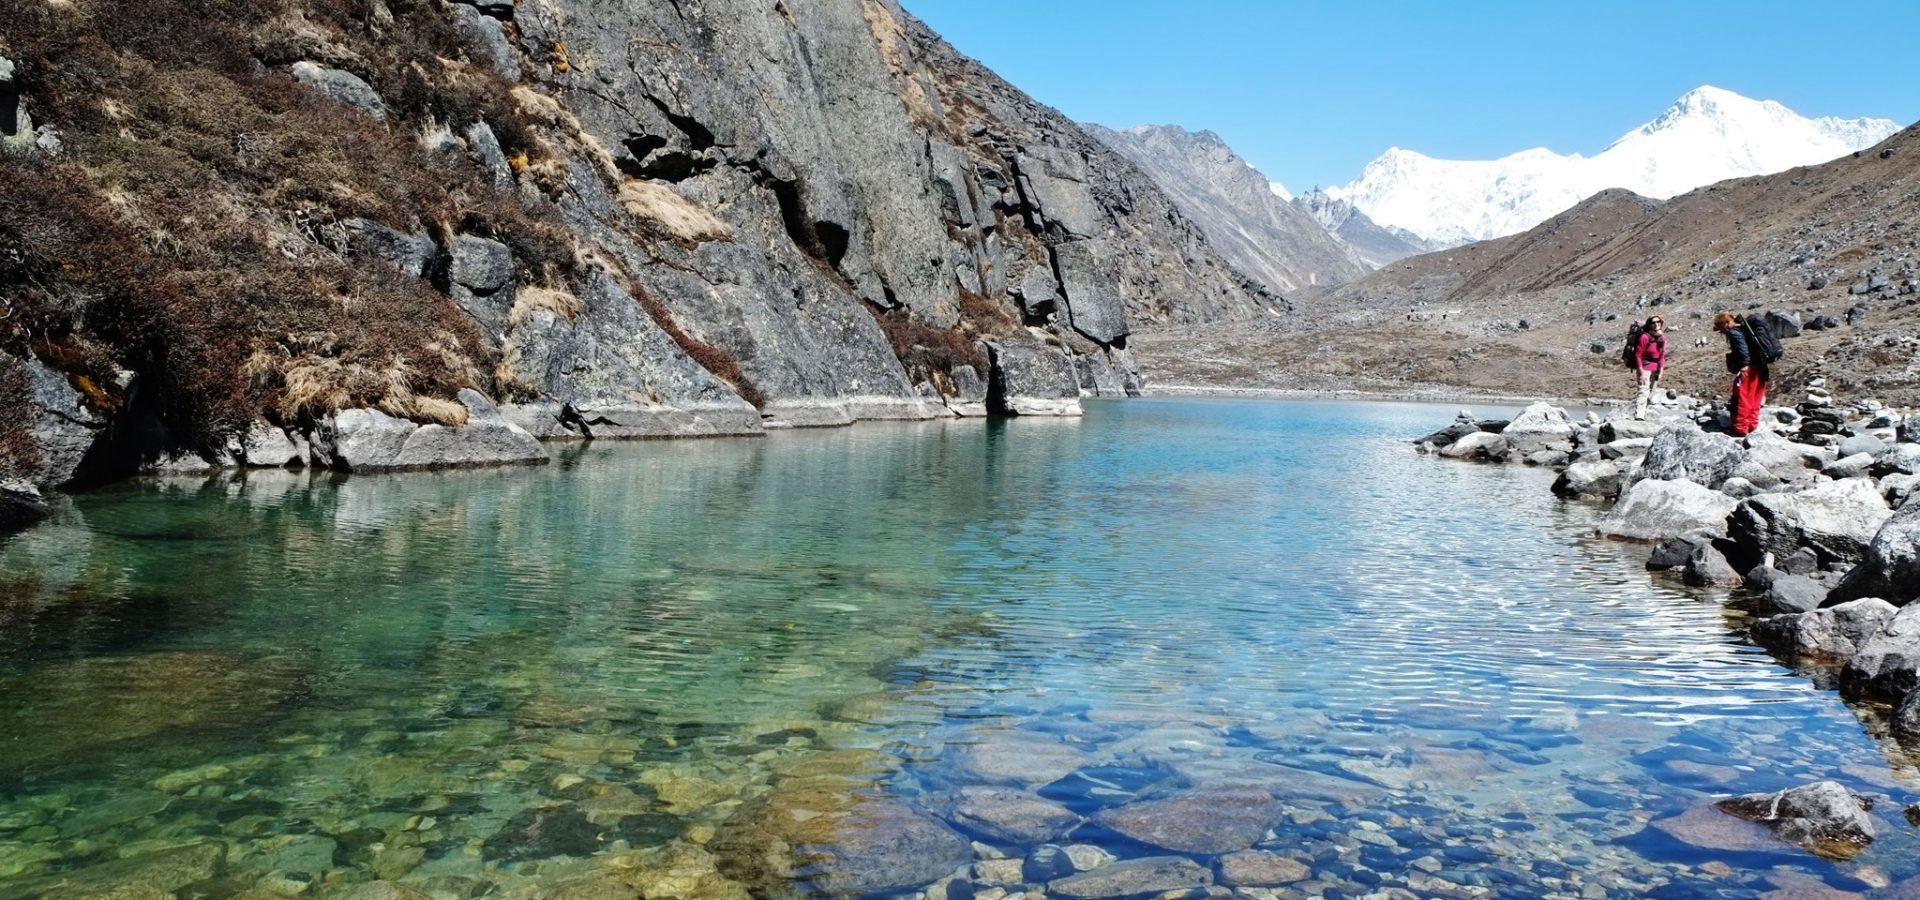
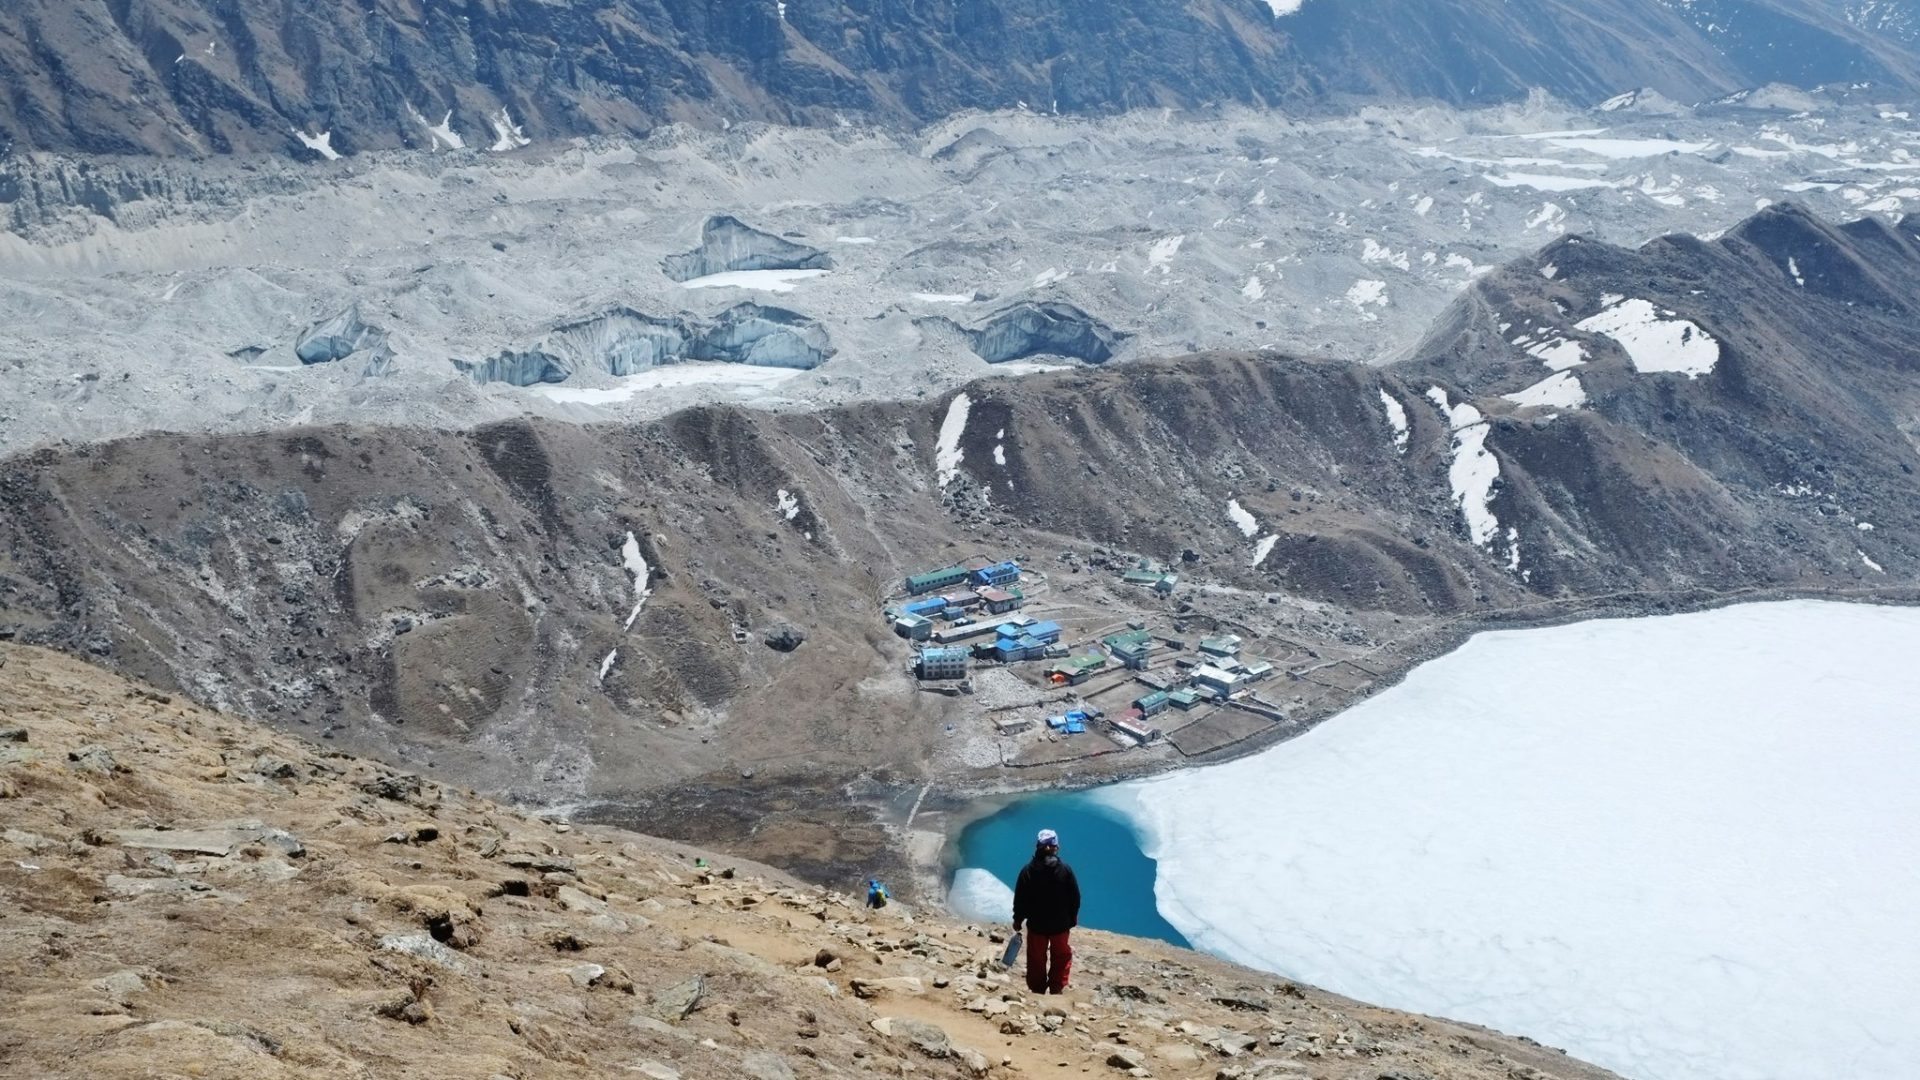
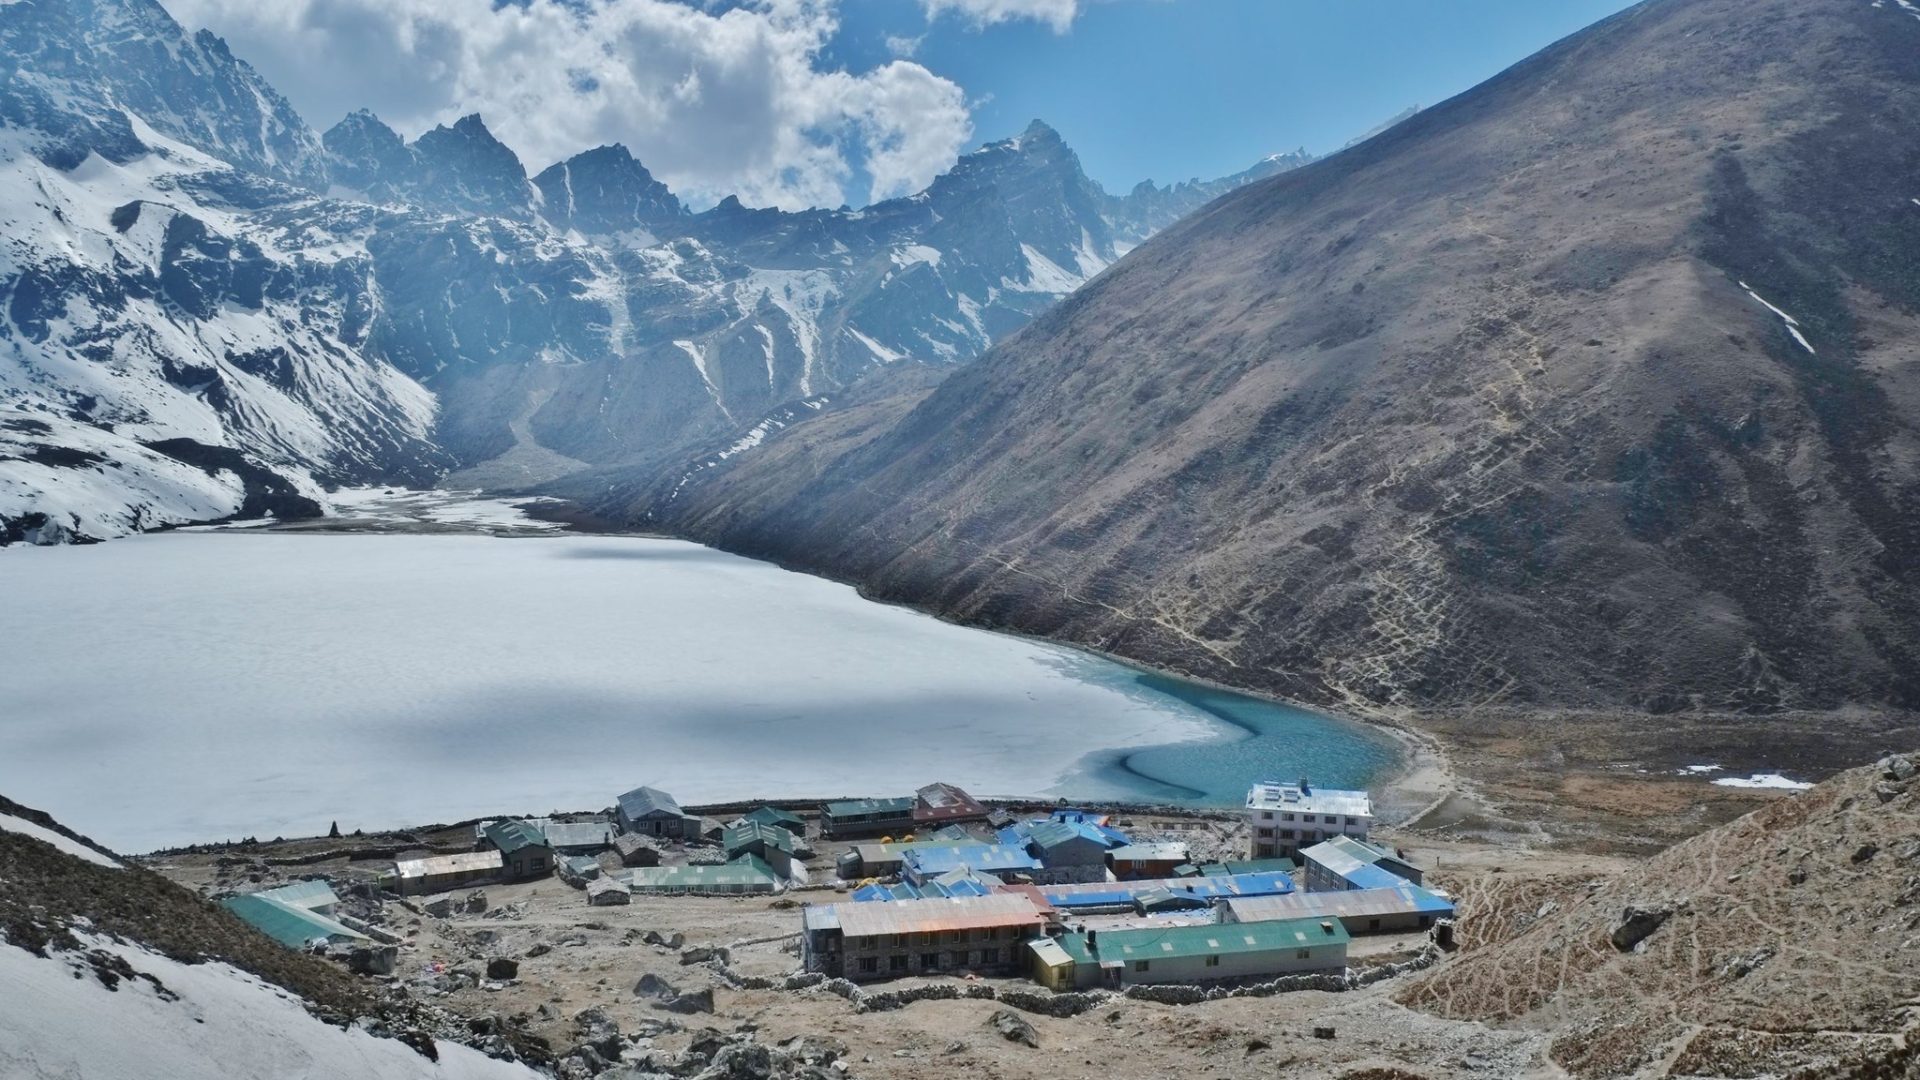
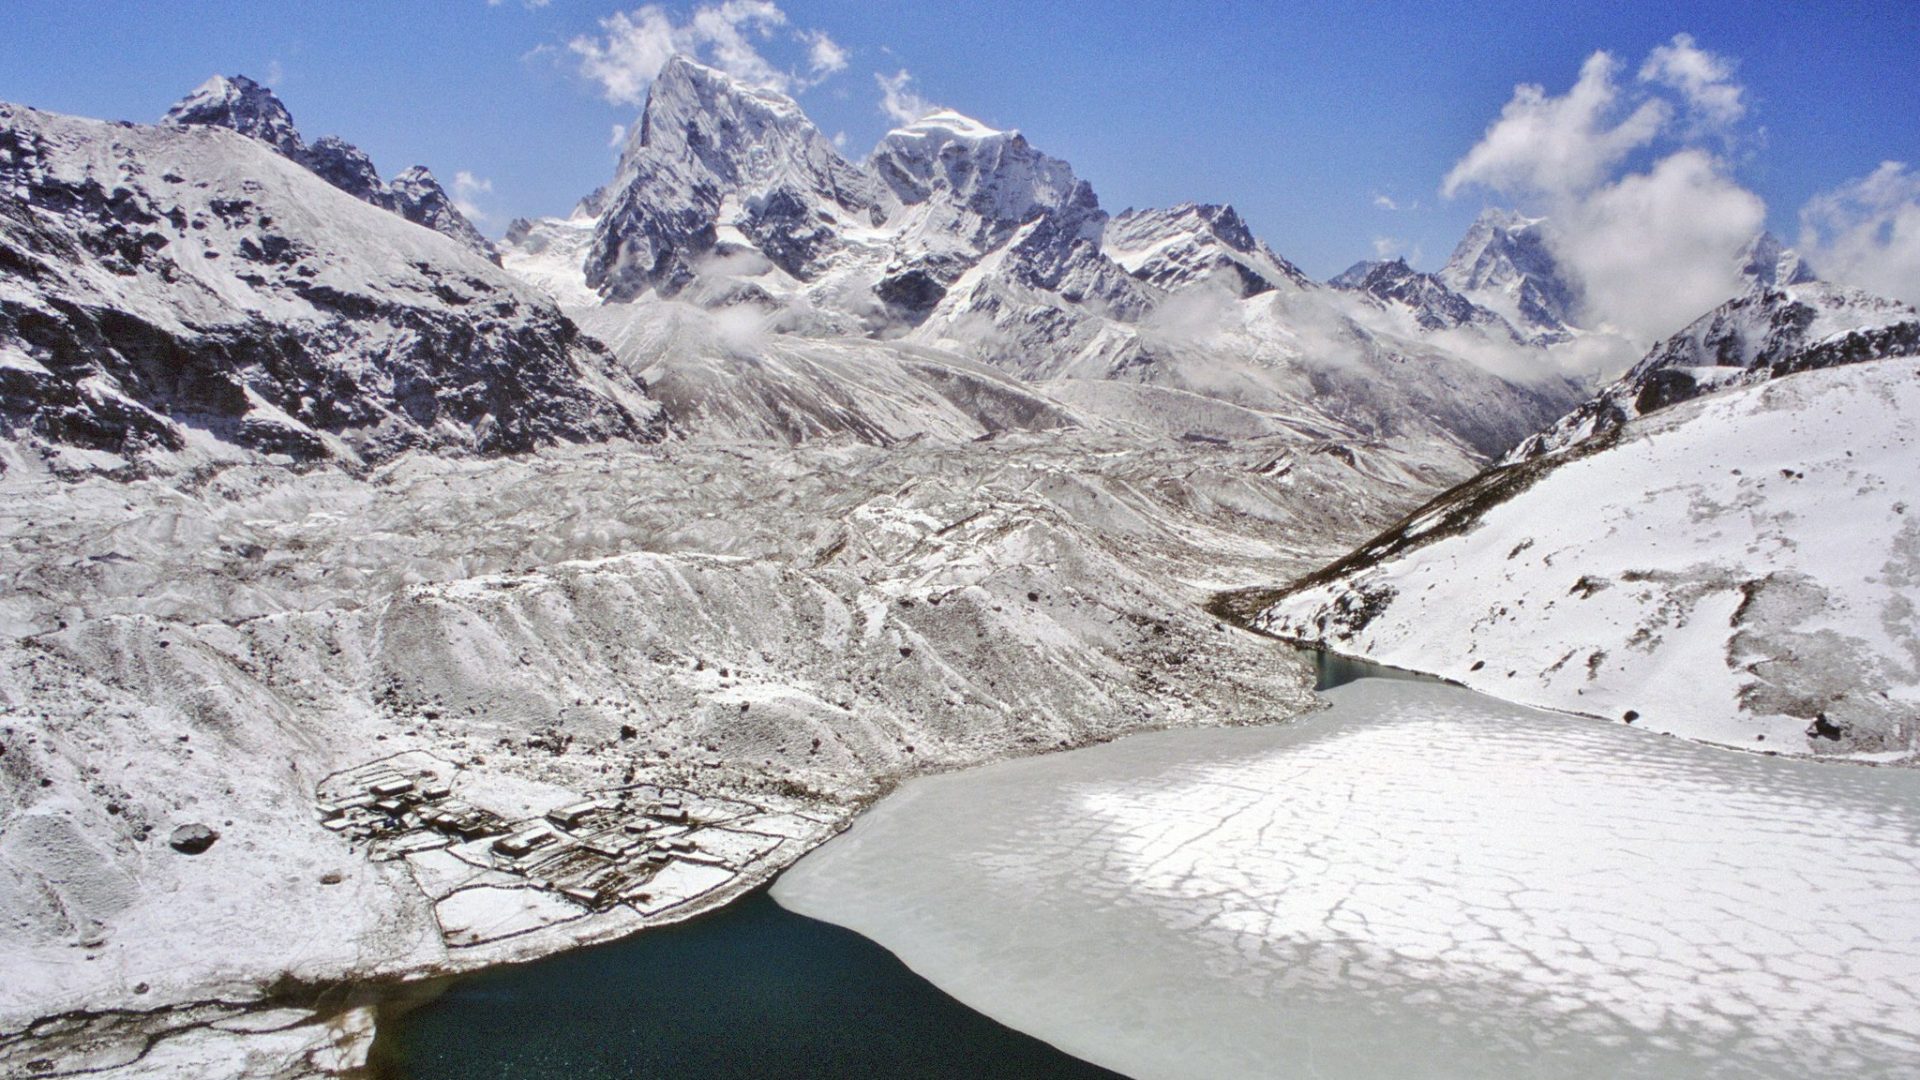
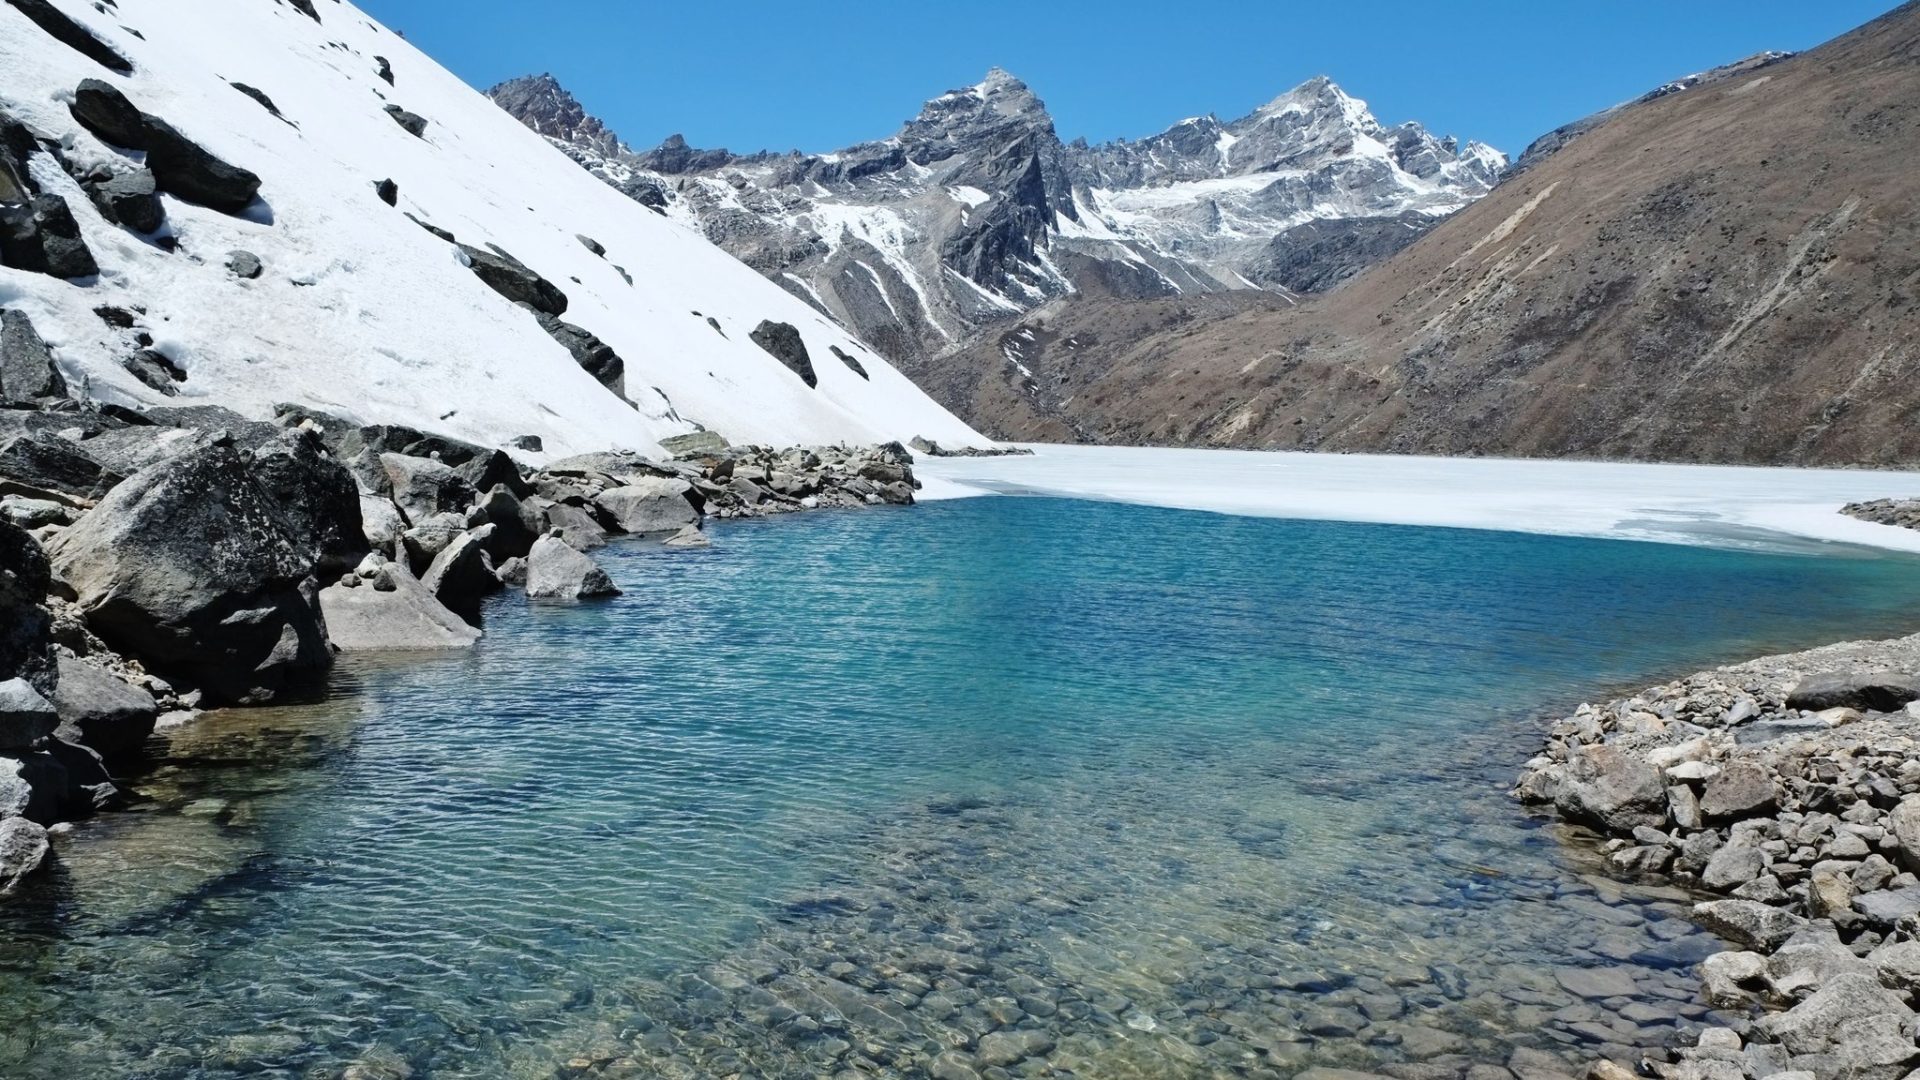
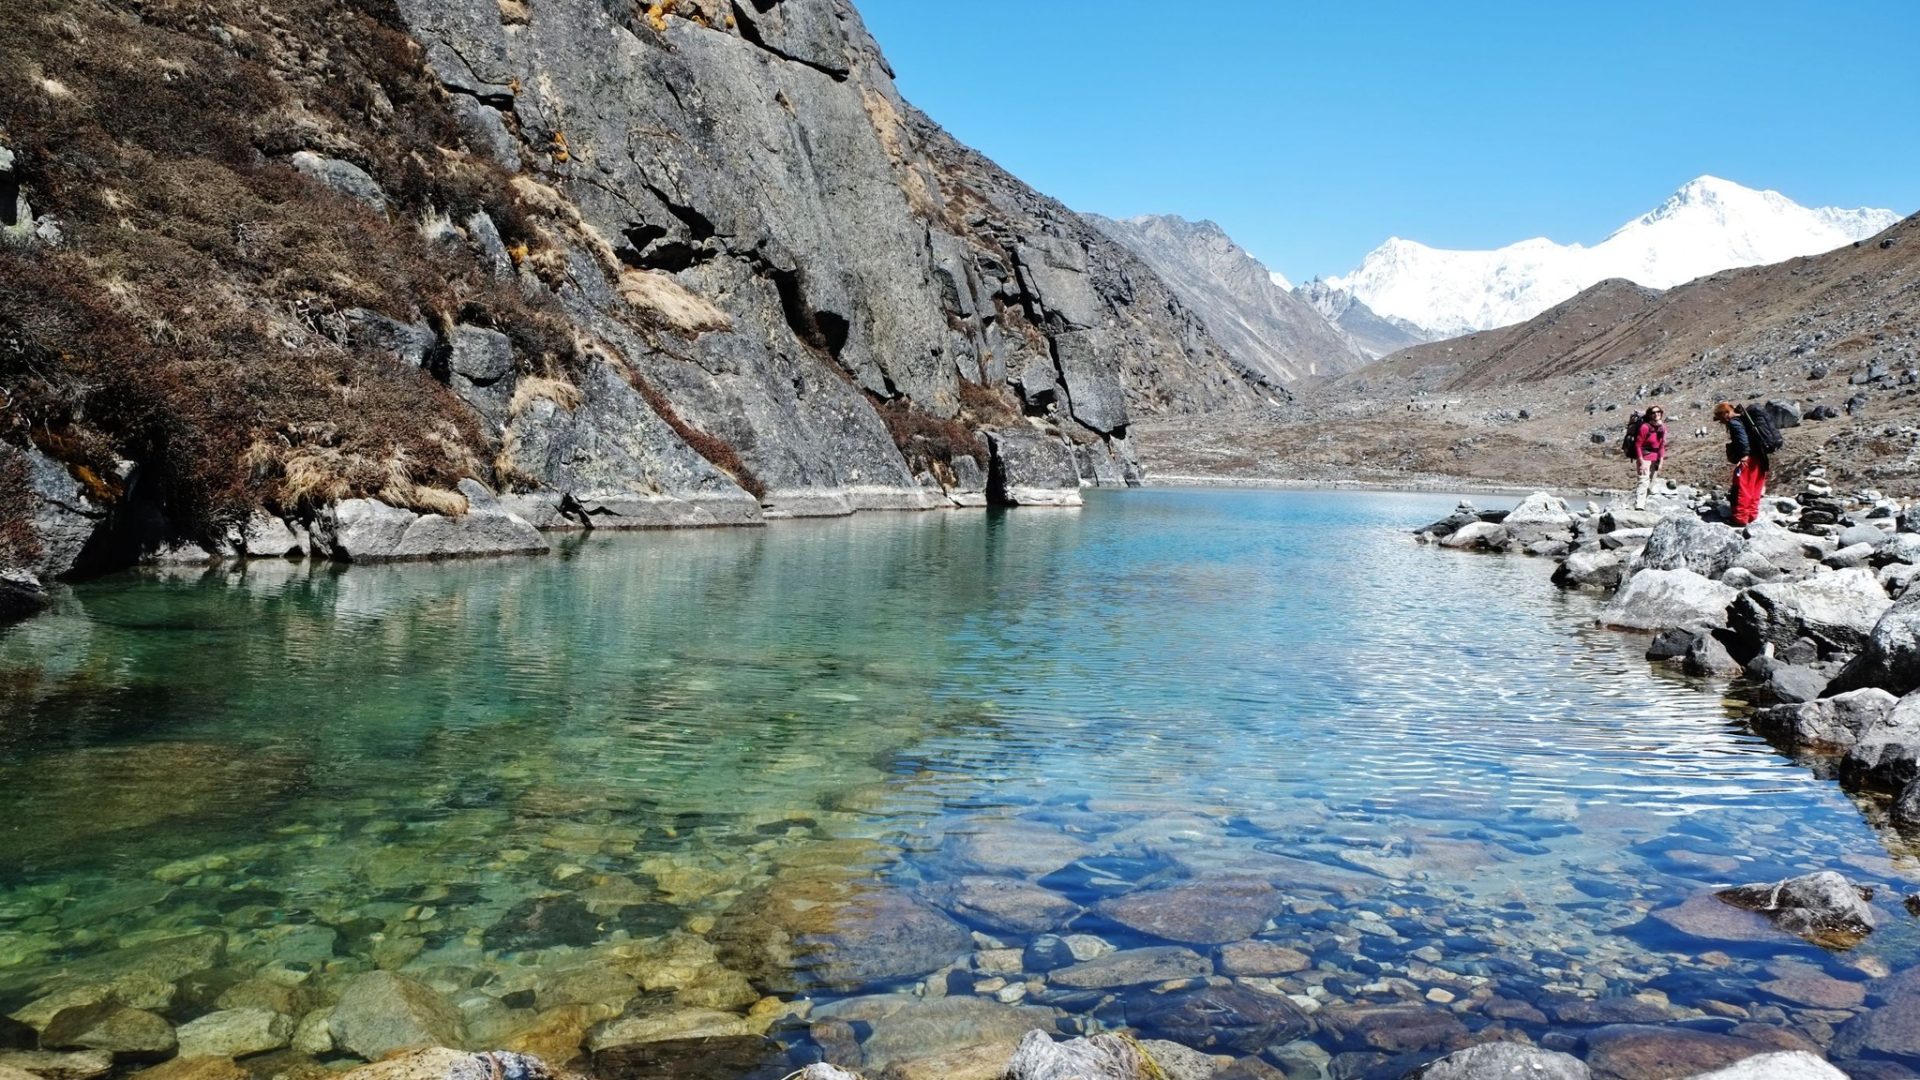
- The trek takes you to the Gokyo Valley, where you encounter a series of turquoise glacial lakes. The most famous among them are the Gokyo Lakes, adding a surreal and serene aspect to the landscape.
- Climbing Gokyo Ri, a high vantage point at approximately 5,357 meters (17,575 feet), offers panoramic views of some of the world's highest peaks, including Mount Everest, Lhotse, Makalu, Cho Oyu, and more.
- Throughout the trek, you're treated to breathtaking views of iconic Himalayan peaks such as Mount Everest, Lhotse, Nuptse, Makalu, Cho Oyu, and Ama Dablam, among others.
- Trekking alongside the Dudh Koshi River provides stunning scenery, with deep gorges, suspension bridges, and lush rhododendron forests.
- The vibrant and bustling town of Namche Bazaar, known as the Sherpa capital, offers a glimpse into the local culture, markets, and traditions of the Sherpa people.
- The trek provides opportunities to interact with the Sherpa community, learn about their unique culture, visit monasteries, and experience their warm hospitality.
- The itinerary includes acclimatization days in Namche Bazaar and Gokyo to help trekkers adjust to the high altitudes gradually and reduce the risk of altitude sickness.
- Gokyo village itself is a charming destination, surrounded by mountains and situated near the pristine lakes. It offers a serene atmosphere for trekkers to relax and enjoy the surroundings.
- The trek takes you through diverse landscapes, from lush forests and riverside trails to alpine meadows and rocky moraines.
- Accommodations along the trail are in teahouses, providing an authentic experience of trekking in the Everest region and allowing interaction with fellow trekkers.
Trek Region
English
Max Altitude
5,364m (17,598 ft)
Best Season
Mar-May, Sep-Nov
Difficulty
Moderate
Guide
Provided
Activities
Trekking & Hiking
Start/End Point
Kathmandu
Meals
Included
Accommodation
Tea House / Lounge
Transportation
Flight
Trip Code
GLT-11
Trip Overview
The Gokyo Lake Trek is a captivating journey in the Everest region of Nepal, offering trekkers a more tranquil alternative to the popular Everest Base Camp route. Known for its stunning vistas of towering peaks like Mount Everest, Cho Oyu, Lhotse, and Makalu, this trek leads to the serene turquoise waters of the Gokyo Lakes. Starting with a thrilling flight from Kathmandu to Lukla, the trek follows the Dudh Koshi River, passing through vibrant Sherpa villages like Namche Bazaar, where trekkers can acclimatize and explore local culture. The route then diverts towards the peaceful Gokyo Valley, ascending gradually through alpine meadows and traditional settlements like Dole and Machhermo, surrounded by stunning Himalayan landscapes.
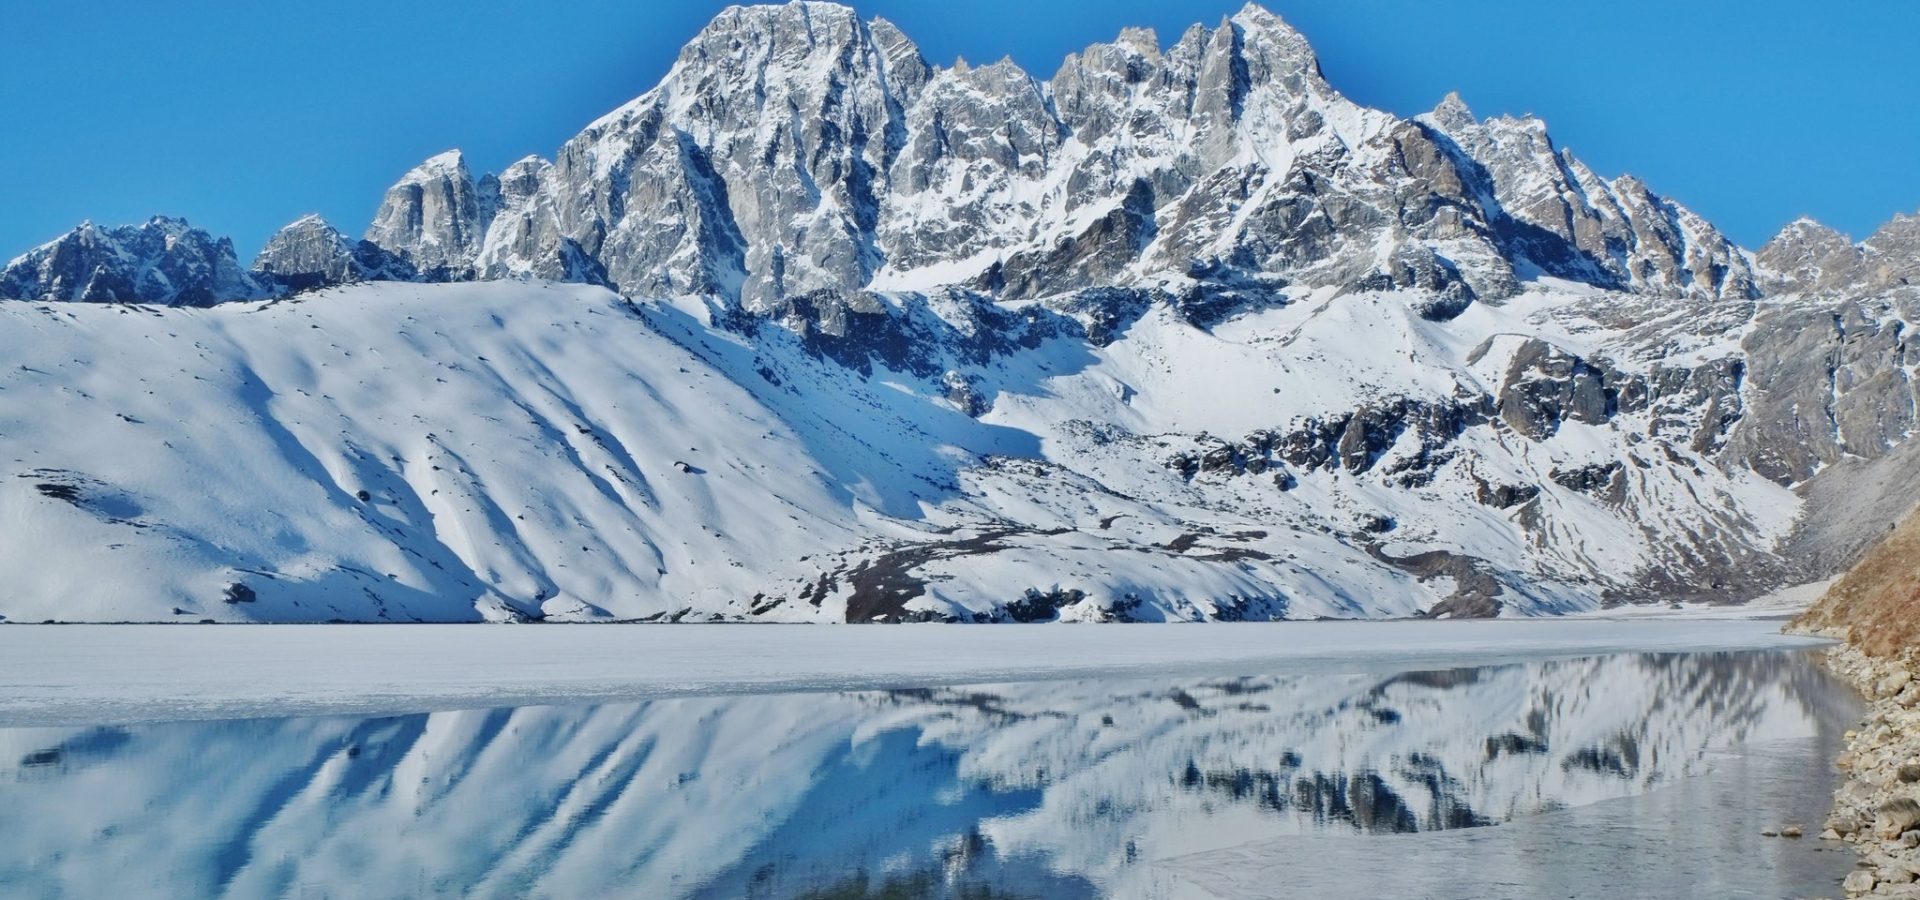
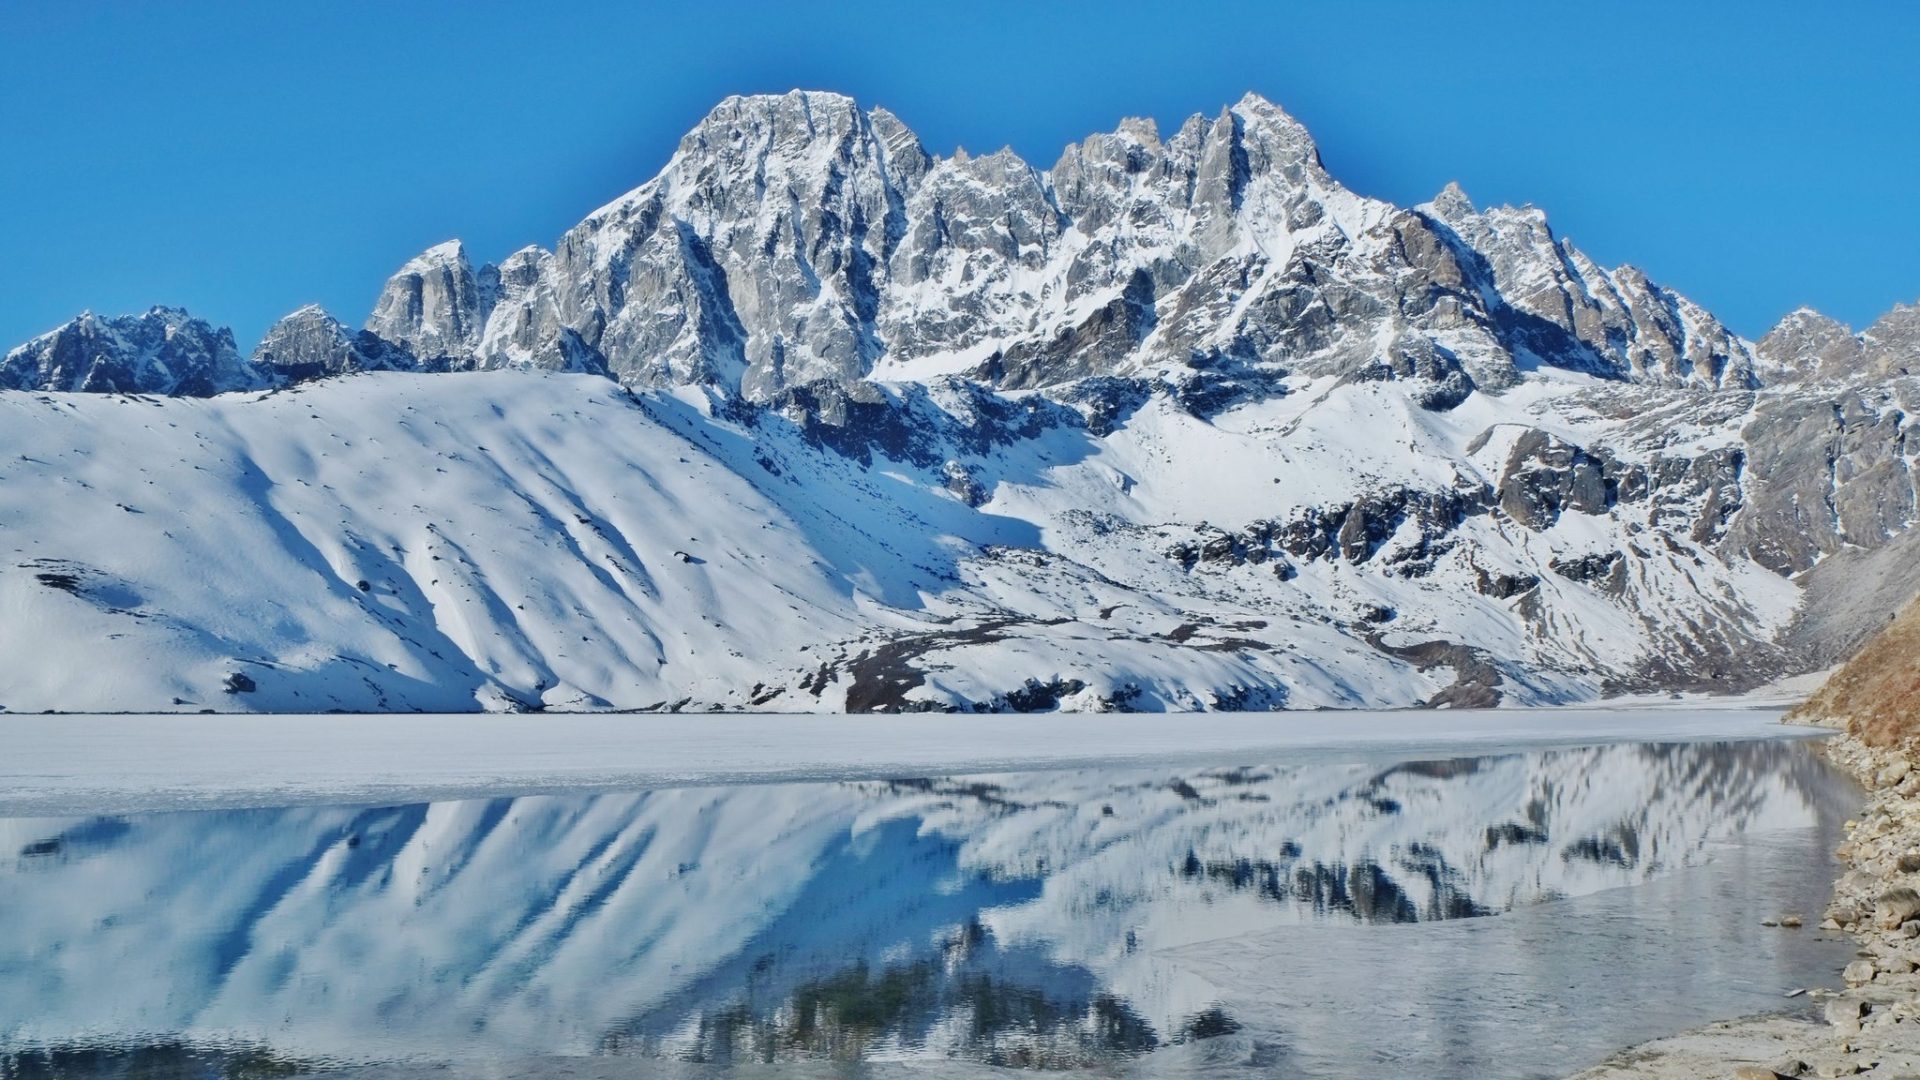
The highlight of the trek is reaching the Gokyo Lakes, a series of six glacial lakes that lie at the heart of the valley. The largest, Dudh Pokhari, reflects the surrounding mountains, creating an ethereal setting at nearly 5,000 meters. From Gokyo, trekkers can ascend Gokyo Ri (5,357 meters), a viewpoint that offers some of the most magnificent panoramic views in the Himalayas, including four of the world’s tallest peaks. For those seeking further adventure, the trek can extend over the challenging Renjo La Pass (5,360 meters), a high-altitude crossing that connects Gokyo with the less-frequented Thame Valley, offering even more solitude and dramatic mountain scenery.
Along the trek, trekkers will experience the pristine beauty of the Ngozumpa Glacier, the largest glacier in Nepal, and gain insight into the rich Sherpa culture. The trek typically takes 12-15 days and offers a moderate to challenging experience, making it ideal for those looking for both natural beauty and an adventurous challenge. The best seasons to embark on the Gokyo Lake Trek are spring (March to May) and autumn (September to November), when the weather is clear, and the views are at their best. This trek provides an unforgettable combination of breathtaking landscapes, cultural immersion, and a less crowded experience in the Everest region.
Best Time to Visit Gokyo Lake Trek
The best time to visit the Gokyo Lake trek in Nepal is during the pre-monsoon (spring) and post-monsoon (autumn) seasons. These periods offer the most favorable weather conditions and stunning views:
Spring (March to May)
- Weather: Mild temperatures and generally clear skies.
- Scenery: The trail is lush and vibrant with blooming rhododendrons, making it a colorful and scenic time to trek.
- Temperature: Days are pleasant, but nights can still be cold, especially at higher altitudes.
- Mild temperatures: Comfortable trekking temperatures during the day.
- Blooming flora: The trail is filled with blooming rhododendrons and other wildflowers, making for beautiful landscapes.
- Clear mornings: The weather is generally clear in the mornings, offering great views of Everest, Cho Oyu, and other peaks.
- Longer daylight hours: More daylight for trekking.
- Crowded trails: Spring is one of the most popular times, so expect more trekkers on the trail.
- Afternoon clouds: Some cloud cover in the afternoons can obscure the views.
- Higher prices: Due to the popularity of this season, prices for accommodations and services may be higher.
Autumn (September to November)
- Weather: Post-monsoon season has stable, clear weather, with bright blue skies and fantastic mountain views.
- Visibility: Perfect for panoramic views of Everest, Cho Oyu, and other Himalayan peaks.
- Temperature: Similar to spring, with pleasant days and cold nights.
- Stable weather: Post-monsoon season provides the most stable and clear weather, perfect for trekking.
- Crystal-clear views: The skies are typically clear, offering the best panoramic views of the mountains.
- Crisp air: The air feels fresh after the monsoon, making trekking more pleasant.
- Cultural festivals: You may experience local festivals such as Dashain and Tihar, adding cultural richness to your trek.
- Crowded: Like spring, autumn is peak trekking season, so the trails, teahouses, and viewpoints can be busy.
- Cold nights: Temperatures drop at higher altitudes, especially at night, requiring proper gear.
- Booking in advance: Due to the popularity, it’s necessary to book accommodations and flights well in advance.
Monsoon (June to August)
- This period is generally avoided due to heavy rainfall, which makes the trails slippery and increases the risk of landslides. Clouds also block mountain views.
- Lush landscapes: The region is very green and vibrant due to the rain, with fewer trekkers on the trail.
- Quiet trails: Fewer people trek during this time, so you’ll experience much more solitude.
- Rainy conditions: Heavy rain can make the trails muddy and slippery, increasing the risk of landslides and making trekking more difficult.
- Leeches and insects: The humidity brings more insects and leeches, which can be bothersome.
- Poor visibility: Cloud cover often obscures the mountain views, which is one of the key attractions of this trek.
- Flight delays: Lukla flights (to and from the starting point of the trek) can be delayed or canceled due to poor weather conditions.
Winter (December to February)
- While the skies are often clear, this season is very cold, especially at high altitudes, with snowfall potentially blocking some passes. Only suitable for experienced trekkers seeking solitude.
- Solitude: The trek is less crowded, offering peace and solitude for those who prefer quieter trails.
- Clear skies: The weather is generally clear, with uninterrupted mountain views.
- Cheaper prices: Lower demand results in more affordable accommodations and services.
- Extreme cold: Temperatures can drop well below freezing, especially at higher altitudes, making it very challenging.
- Snowfall: Heavy snowfall can block trails and passes, including the Renjo La Pass, making parts of the trek impassable.
- Limited facilities: Many teahouses may be closed due to the cold, limiting accommodation options.
The best time to trek the Gokyo Lakes is during autumn (September to November) or spring (March to May). Autumn offers stable weather, clear skies, and spectacular views of Everest and the surrounding peaks, making it the most popular season for trekkers. Spring provides milder temperatures and the added beauty of blooming rhododendrons, although afternoons may bring some clouds. Both seasons have comfortable trekking conditions, but also attract more crowds and require booking in advance. While winter (December to February) offers solitude and clear views, the extreme cold and potential snowfall make it suitable only for experienced trekkers. Monsoon (June to August), with its heavy rains and slippery trails, is generally not recommended due to poor visibility and trekking challenges.
Difficulty Level
- Highest Point: Gokyo Ri (5,357 meters/17,575 feet)
- Challenges: The trek takes you above 5,000 meters, where the air is thin, and the risk of altitude sickness increases. Proper acclimatization is crucial, and trekkers must ascend gradually, allowing the body to adjust to lower oxygen levels.
- Total Duration: 12-14 days, depending on acclimatization days and trekking pace.
- Daily Trekking: You’ll hike for 5 to 8 hours per day, with varying difficulty levels based on the day’s elevation gain and terrain.
- Total Distance: Roughly 90-100 kilometers (55-62 miles) round trip.
- Toughest Day: The ascent to Gokyo Ri is one of the hardest days due to its steep incline and high altitude.
- Best Times: Autumn (September to November) and Spring (March to May).
- Challenges: The weather can be unpredictable, especially at high altitudes. Mornings are often clear, but clouds and wind can roll in during the afternoons. In winter, temperatures can drop dramatically, and snow can block passes.
- Temperatures: At higher altitudes, night temperatures can fall well below freezing, even in spring and autumn.
- Requirements: Good cardiovascular fitness and leg strength are essential, as the trek involves steep climbs and descents.
- Preparation: Trekkers should engage in endurance training (long hikes, stair climbing, or running) and strength training before the trek.
- Level: You don’t need to be an elite athlete, but moderate to high fitness is required to handle long days and the physical exertion of trekking at high altitudes.
- Challenges: The combination of altitude, long days, and cold conditions can be mentally taxing. Staying motivated, keeping a positive attitude, and pacing yourself are important for completing the trek.
- Isolation: Certain parts of the trail are remote, with limited access to amenities, which can make the journey feel more isolated and demanding.
- Skill Level: The Gokyo Lake trek doesn’t require any technical climbing skills, but it does involve hiking over rocky and uneven terrain, sometimes covered in snow or ice.
- Steep Climbs: Parts of the trek, especially the ascent to Gokyo Ri and the crossing of Renjo La Pass, are steep and require careful footing.
- Teahouses: Basic teahouses are available throughout the route, offering food and lodging. They are comfortable but basic, with limited heating, especially at higher elevations.
- Facilities: Showers and electricity are available, but you’ll need to pay extra for both. Internet access is limited and expensive. The higher you go, the fewer facilities there are, and food choices may become more limited.
- Water: Safe drinking water must be purchased or purified from local sources.
- Best Suited For: Trekkers with good physical fitness and some high-altitude trekking experience.
- Challenges: High altitudes, steep ascents, and long trekking days.
- Scenery: Stunning views of the Gokyo Lakes, Everest, and other Himalayan peaks.
- Technical Skills: No technical climbing skills required.
- Weather Conditions: Potentially harsh weather, especially at high altitudes.
- Mental Toughness: Requires mental resilience to handle physical exertion and altitude effects.
- Overall: Demanding but immensely rewarding.
With proper preparation, training, and acclimatization, the Everest Base Camp trek can be a rewarding and doable challenge for most adventurers.
Packing List for Gokyo Lake Trek
The Gokyo Lake Trek is a stunning and adventurous journey in the Everest region, offering breathtaking views of the Gokyo Lakes, Gokyo Ri, and Cho Oyu. Since you’ll be trekking in high-altitude environments with rapidly changing weather, packing the right gear is crucial for a comfortable and successful trek. Below is a detailed packing list to ensure you are well-prepared.
Base Layer
- Moisture-Wicking T-Shirts (2-3): Lightweight and quick-drying materials such as merino wool or synthetic fabrics are ideal.
- Thermal Tops and Bottoms (2 pairs): These provide insulation in cold weather.
Mid Layer (Insulation)
- Fleece Jacket: Lightweight but warm, used for layering.
- Insulated Jacket (Down or Synthetic): A puffy jacket to keep you warm during cold mornings and evenings.
Outer Layer (Wind and waterproof protection)
- Waterproof and Windproof Jacket (Gore-Tex or similar): Essential for protection against rain, wind, and snow.
- Waterproof and Windproof Trousers: Protects your legs in wet and windy conditions.
Trekking Trousers
- Convertible/Quick-Dry Trekking Pants (2 pairs): Lightweight and comfortable for day-to-day trekking.
- Thermal Leggings: For extra warmth during the night or under your trekking pants on cold days.
Underwear
- Quick-Dry Underwear (4-5 pairs): Lightweight, breathable, and moisture-wicking.
Headwear
- Wool or Fleece Beanie: To keep your head warm in cold conditions.
- Sun Hat/Cap: For protection against the sun at high altitudes.
- Neck Gaiter/Buff: To protect your face from cold, wind, and dust.
Gloves
- Inner Gloves: Lightweight gloves for mild conditions.
- Insulated Outer Gloves: Warm, waterproof gloves for colder days and higher altitudes.
Footwear
- Trekking Boots: High-quality, waterproof boots with good ankle support.
- Camp Shoes/Sandals: Comfortable footwear for the evenings in the teahouses.
- Trekking Socks (4-5 pairs): Merino wool or synthetic socks to keep your feet warm and dry.
- Thermal Socks: For extra warmth during the night or cold trekking days.
Trekking Gear
- Daypack (20-30L): For carrying essentials like water, snacks, camera, and rain gear during the day.
- Duffel Bag (provided by trekking company, if applicable): This will be carried by porters.
- Rain Cover: For your backpack, to keep your belongings dry during unexpected rain.
- Trekking Poles: Useful for balance and reducing the strain on your knees during descents.
- Sleeping Bag (Comfort Rating -15°C / 5°F): A warm sleeping bag for the cold nights at high altitudes.
- Headlamp: Essential for navigating in the dark and during early morning starts (carry extra batteries).
- Sunglasses (UV Protection): To protect your eyes from the intense sunlight and snow glare.
Personal Items
- Water Bottle (1L): A durable water bottle or hydration system (e.g., CamelBak).
- Water Purification Tablets/Drops: To purify water along the trek.
- Personal First Aid Kit: Include blister treatment, antiseptic cream, band-aids, and pain relief medication.
- Personal Toiletries: Toothbrush, toothpaste, wet wipes, hand sanitizer, and biodegradable soap.
- Trekking Towel: Quick-drying towel for personal use.
- Lip Balm with SPF: To protect your lips from sunburn and dryness.
- Sunscreen (SPF 50+): High-altitude UV exposure is intense.
- Moisturizing Lotion: For dry skin caused by cold and windy conditions.
Health and Safety
- Altitude Sickness Medication (Diamox): Consult your doctor and carry it as a precaution.
- Waterproof Bags/Dry Bags: To keep your electronics and documents dry.
- Personal Medications: Any prescribed medications you may need.
- Blister Care: Blister pads or tape to prevent and treat blisters.
- Hand Warmers: Optional but helpful for extremely cold conditions.
Miscellaneous
- Snacks/Energy Bars: High-calorie snacks like nuts, energy bars, or dried fruit for energy boosts during the trek.
- Camera/Phone: To capture the beautiful scenery (carry extra batteries or a power bank due to cold conditions).
- Power Bank: Charging devices in the mountains can be difficult, so carry a power bank with sufficient capacity.
- Book/Journal: For reading or journaling in the evenings.
- Earplugs: Teahouses can be noisy, so earplugs help for a good night’s sleep.
- Cash: There are no ATMs on the trek, so carry enough cash (in Nepali rupees) for personal expenses like snacks, drinks, tips, and souvenirs.
- Passport and Visa: Ensure your visa for Nepal is up-to-date.
- Trekking Permits: Sagarmatha National Park entry permit and TIMS card (usually arranged by your trekking company).
- Travel Insurance: Make sure your travel insurance covers high-altitude trekking and emergency evacuation.
- Gaiters: To protect your boots and legs from snow or mud.
- Portable Solar Charger: If you’re using multiple electronic devices and expect to be off-grid for a while.
- Lightweight Pillow: Some trekkers prefer to carry their own inflatable pillow for comfort.
- Pack Light but Efficient: Focus on items that are necessary, lightweight, and multipurpose.
- Layering: This is key to adapting to varying temperatures throughout the trek.
- Waterproofing: Ensure everything is packed in waterproof bags to avoid moisture damage.
- Break in Your Boots: Make sure your trekking boots are well broken in before the trek to avoid blisters.
This list ensures you’re well-prepared for varying conditions, from warm days to freezing nights at higher altitudes, while staying light and efficient.
Trip Itinerary
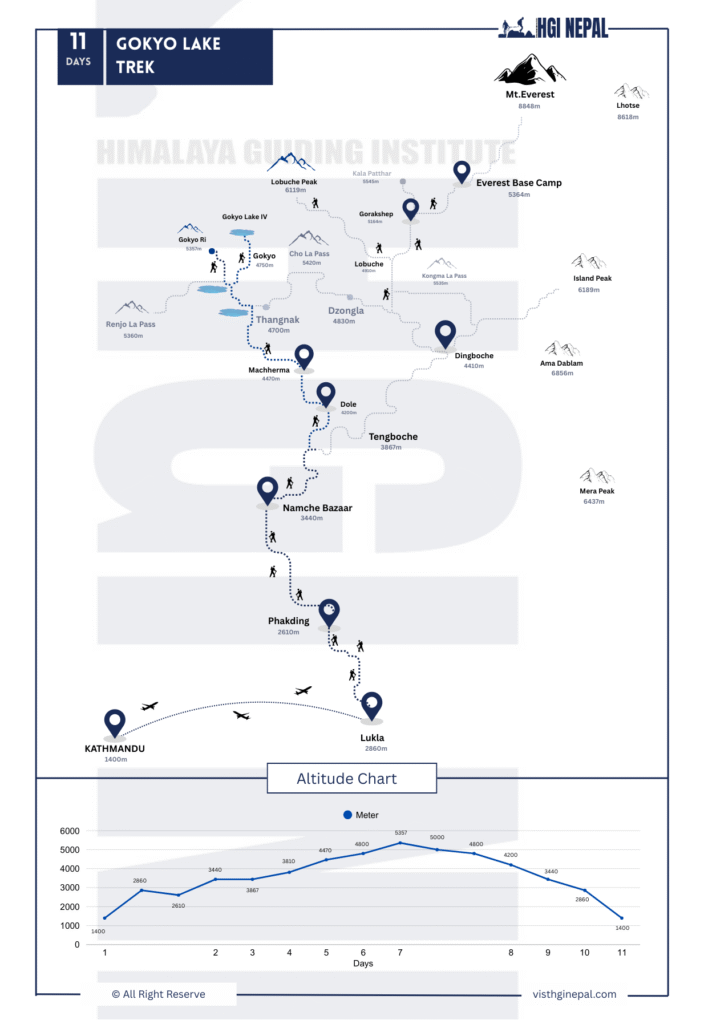
- Day 1: Fly to Lukla & Trek to Phakding
Overview
- Flight Duration: Approximately 30-40 minutes from Kathmandu to Lukla
- Trek Distance: Approximately 8 km (5 miles)
- Trek Duration: 3-4 hours
- Starting Elevation: Lukla (2,860 m / 9,383 ft)
- Ending Elevation: Phakding (2,610 m / 8,563 ft)
- Difficulty Level: Easy to Moderate
The adventure begins with an exhilarating flight from Kathmandu to Lukla, often regarded as one of the most scenic flights in the world. Once you arrive in Lukla, the trek to Phakding serves as a gentle introduction to the stunning landscapes and the rich culture of the Khumbu region.
Details of the Journey
1. Flight from Kathmandu to Lukla
- Departure: Flights to Lukla are typically scheduled in the morning due to favorable weather conditions. Ensure to arrive at the airport early for check-in and security procedures.
- Scenic Flight: The flight offers breathtaking views of the Himalayas, including Mount Everest and other majestic peaks. The landing at the Lukla airport, perched on a cliff, is an experience in itself, with a short runway and stunning mountain backdrop.
2. Arrival in Lukla
- Lukla Airport: Upon arrival at Lukla Airport, you will be greeted by your trekking guide and support staff. Take a moment to acclimatize to the altitude and enjoy the vibrant atmosphere of the town.
- Preparation: Check your gear and make any final adjustments before setting off. It’s advisable to have a light breakfast and hydrate before starting your trek.
3. Trek from Lukla to Phakding
- Trail Overview: The trek from Lukla to Phakding follows a well-defined path along the Dudh Koshi River. The trail is generally flat with gentle descents, making it an easy trek suitable for all fitness levels.
4. Trekking Highlights
- Beautiful Landscapes: As you walk, enjoy views of lush green valleys, terraced fields, and picturesque villages. The area is dotted with charming lodges and tea houses catering to trekkers.
- Rivers and Suspension Bridges: Cross several suspension bridges, where you can see prayer flags fluttering in the wind, adding a colorful touch to the scenery.
- Cultural Experience: Pass through local villages, where you may encounter friendly locals and their yaks. This is an excellent opportunity to experience Sherpa culture and hospitality.
5. Arrival in Phakding
- Phakding Village: Phakding is a small, picturesque village situated along the banks of the Dudh Koshi River, surrounded by stunning mountain scenery.
- Accommodation: Upon arrival, check into a teahouse or lodge. Many teahouses in Phakding offer basic but comfortable accommodations.
- Relax and Unwind: After settling in, take some time to explore the village, relax, and enjoy the beautiful surroundings.
6. Evening in Phakding
- Dinner and Briefing: Enjoy a hearty dinner at the teahouse. Your guide may provide a briefing about the following day’s trek and important safety tips.
- Hydration and Rest: Make sure to drink plenty of water and get a good night’s sleep to prepare for the trekking ahead.
Important Tips
- Altitude Acclimatization: While the trek from Lukla to Phakding is not particularly strenuous, it’s important to stay hydrated and take note of how your body feels at higher altitudes.
- Trekking Gear: Ensure your trekking gear is organized and accessible for the day. Carry a small daypack with essentials like water, snacks, and a camera.
- Weather Preparedness: Be prepared for changing weather conditions. A lightweight waterproof jacket is advisable, as rain can occur unexpectedly.
The trek from Lukla to Phakding is the perfect start to your Gokyo Lake Trek. It allows you to acclimatize gently while soaking in the stunning scenery and immersing yourself in the local culture. This first leg sets the tone for the adventures that lie ahead in the majestic Everest region. Enjoy your journey!
- Day 2 : Trek from Phakding to Namche Bazaar
Overview
- Trek Distance: Approximately 11 km (6.8 miles)
- Trek Duration: 5-6 hours
- Starting Elevation: Phakding (2,610 m / 8,563 ft)
- Ending Elevation: Namche Bazaar (3,440 m / 11,286 ft)
- Difficulty Level: Moderate to Challenging (due to steep ascents and altitude)
The trek from Phakding to Namche Bazaar is one of the most iconic segments of the Everest region, taking you deeper into the heart of the Himalayas. The trail follows the beautiful Dudh Koshi River, passing through rhododendron forests, crossing suspension bridges, and gradually ascending to the vibrant Sherpa town of Namche Bazaar, the gateway to the Everest region.
Trek Details
1. Departing from Phakding
- After an early breakfast, you’ll set off from Phakding. The trail starts gently with a walk along the banks of the Dudh Koshi River.
- You’ll pass through several small villages like Toktok and Benkar, where you can stop for short breaks, tea, or water refills.
2. Entering Sagarmatha National Park (Monjo)
- Trek Duration to Monjo: Approximately 2 hours.
- You’ll reach the village of Monjo (2,835 m), where the entrance to Sagarmatha National Park is located. Your guide will handle the permit formalities here.
- This is a great spot to take a break, enjoy some snacks, and admire the views before continuing on.
3. Crossing the Famous Suspension Bridges
- As you continue trekking, you’ll cross several suspension bridges over the Dudh Koshi River. These bridges are often decorated with fluttering prayer flags and provide exhilarating views of the river and the surrounding valleys.
- The most famous of these is the Hillary Suspension Bridge, which is the highest and longest bridge on this trek. It’s an iconic spot where many trekkers stop to take photos.
4. The Steep Climb to Namche Bazaar
- Trek Duration: 2-3 hours of continuous ascent.
- After crossing the Hillary Bridge, the trek becomes more challenging with a steep uphill climb. This section is one of the most strenuous parts of the day, and the altitude gain starts to become noticeable.
- The ascent is switchbacked, so take your time, keep a steady pace, and enjoy the breathtaking views of the surrounding mountains.
5. First Glimpse of Mount Everes
- As you ascend, you may catch your first glimpse of Mount Everest, along with other towering peaks like Lhotse and Ama Dablam. This moment is often a highlight for trekkers and offers motivation during the tough climb
6. Arrival in Namche Bazaar
- Namche Bazaar is a bustling Sherpa town nestled in a natural amphitheater with stunning views of the surrounding mountains.
- Upon arrival, you’ll check into a teahouse or lodge where you’ll stay for the night. Namche offers a range of accommodations, from basic to more comfortable lodges with amenities like Wi-Fi and hot showers (at an additional cost).
Namche Bazaar Highlights
- Sherpa Culture: Namche Bazaar is the cultural hub of the Khumbu region. The town is home to many Sherpas, and you can explore local markets, bakeries, and shops selling trekking gear, handicrafts, and souvenirs.
- Acclimatization Stop: Namche Bazaar is an important stop for acclimatization on your trek. You’ll be spending the next day here to help your body adjust to the altitude before continuing to higher elevations.
- Scenic Views: Namche offers panoramic views of the Himalayas, including peaks like Thamserku and Kongde Ri.
- Everest View Hotel Hike: On your acclimatization day, you may take a short hike to the Everest View Hotel, which offers spectacular views of Mount Everest and other surrounding peaks.
Challenges
- Steep Ascent: The final section of the trek to Namche Bazaar is a steep and tiring climb, especially with the increasing altitude. Take it slow, and don’t hesitate to stop for breaks if needed.
- Altitude Gain: You’ll be ascending over 800 meters (2,600 feet) in one day, which can be challenging. Stay hydrated, walk at a steady pace, and monitor your body for signs of altitude sickness.
Tips for the Day
- Pace Yourself: The climb to Namche is one of the more challenging parts of the trek. Walk slowly and steadily, taking breaks as needed.
- Stay Hydrated: Drink plenty of water to help with acclimatization. Avoid alcohol and caffeine, which can contribute to dehydration.
- Dress in Layers: The weather can change quickly, especially as you gain altitude. Dress in layers so you can adjust to the temperature fluctuations.
The trek from Phakding to Namche Bazaar is both beautiful and challenging, offering trekkers their first major taste of high-altitude trekking in the Everest region. With stunning views, exciting suspension bridges, and a vibrant Sherpa culture awaiting you in Namche, this day is a key milestone in your journey toward Gokyo Lakes or Everest Base Camp.
- Day 3 : Acclimatization at Namche Bazaar & Explore
Overview
- Rest/Exploration Day in Namche Bazaar (3,440 m / 11,286 ft)
- Acclimatization Purpose: To help your body adjust to the higher altitude before continuing the trek to Gokyo Lakes or Everest Base Camp.
- Activities: Short hikes, cultural exploration, and relaxing in Namche.
Spending an acclimatization day in Namche Bazaar is essential for preventing altitude sickness as you ascend higher into the Everest region. This rest day also gives you the opportunity to explore Namche, its rich Sherpa culture, and nearby scenic viewpoints. While it’s called a “rest day,” it is important to stay active with easy hikes to allow your body to adjust to the altitude.
Why Acclimatize in Namche Bazaar?
- Preventing Altitude Sickness: After climbing over 800 meters (2,600 feet) from Phakding to Namche Bazaar, your body needs time to adapt to the reduced oxygen levels. Acclimatization helps prevent Acute Mountain Sickness (AMS), which can cause headaches, nausea, and fatigue.
- “Climb High, Sleep Low” Principle: Acclimatization hikes will take you to higher altitudes during the day, but you’ll return to Namche to sleep at a lower elevation, which helps with acclimatization.
Acclimatization Day Activities in Namche Bazaar
1. Hike to Everest View Hotel
- Hike Duration: 3-4 hours (round trip)
- Starting Elevation: Namche Bazaar (3,440 m / 11,286 ft)
- Highest Elevation: Everest View Hotel (3,880 m / 12,730 ft)
- Difficulty: Easy to Moderate
This is a popular acclimatization hike that offers incredible views of some of the highest peaks in the world, including Mount Everest. The trail ascends gradually through pine and rhododendron forests, providing stunning panoramas as you gain altitude.
- Highlights
- Spectacular views of Mount Everest, Lhotse, Ama Dablam, and Thamserku.
- The Everest View Hotel is one of the highest-altitude hotels in the world, offering a peaceful spot to relax and enjoy tea or coffee with a view of the Himalayas.
- Great photo opportunities of the surrounding peaks and valleys.
2. Visit the Sherpa Culture Museum and Everest Photo Gallery
- Location: A short walk from Namche Bazaar.
- Exhibit Highlights
- Learn about Sherpa history, traditions, and their integral role in Himalayan mountaineering.
- The museum showcases mountaineering equipment from past expeditions, as well as local artifacts.
- The Everest Photo Gallery offers historical photos and breathtaking images of the Everest region.
3. Hike to Syangboche Airstrip (3,780 m / 12,402 ft)
- Hike Duration: 2-3 hours (round trip).
- This airstrip is one of the highest in the world, though it is not frequently used. The hike provides more incredible views of Everest, Lhotse, and Ama Dablam.
- The area around Syangboche is often less crowded, allowing for peaceful exploration of the surrounding hills.
4. Explore Khumjung Village
- Hike Duration: 4-5 hours (round trip).
- Elevation: Khumjung (3,780 m / 12,402 ft).
Khumjung is one of the largest Sherpa villages in the Everest region. This hike is longer but rewarding, as it takes you to a more traditional and less touristy part of the region.
- Khumjung Monastery: A sacred place where you can see the legendary Yeti scalp on display.
- Hillary School: Founded by Sir Edmund Hillary, this school stands as a legacy of his work in the region.
5. Explore Namche Bazaar Itself
- Markets: Namche has a bustling market with shops offering trekking gear, souvenirs, handicrafts, and Sherpa clothing. Saturdays are market days when traders from surrounding areas bring goods to sell.
- Cafés and Bakeries: Namche is known for its delicious bakeries and cafés. Relax and enjoy freshly baked goods, hot coffee, and internet access (though it may be limited).
- Souvenir Shopping: You’ll find plenty of shops selling Tibetan artifacts, local crafts, and trekking gear.
- Relax and Recharge: Spend time in the local bakeries or lodges, catching up with fellow trekkers or reading a book.
Health and Acclimatization Tips
- Stay Hydrated: Drink plenty of water (at least 3-4 liters per day) to help your body acclimatize.
- Avoid Alcohol: Alcohol can dehydrate you and slow the acclimatization process, so it’s best to avoid it.
- Walk Slowly: If you’re hiking to higher altitudes, take it slow and steady. There’s no rush, and moving slowly helps your body adjust.
- Rest and Relax: After your hike, make sure to rest well. Namche has plenty of places to relax and enjoy the stunning surroundings.
- Consult Your Guide: Keep your guide informed about how you’re feeling. If you experience symptoms of altitude sickness (headache, nausea, dizziness), inform your guide immediately.
Acclimatization in Namche Bazaar is a key part of your trek to Gokyo Lakes or Everest Base Camp. The extra day at this altitude gives your body the chance to adjust while you explore the rich culture of the Sherpa people and enjoy panoramic views of the Himalayas. Whether you opt for a short hike, visit a museum, or simply relax in Namche, this day is essential for a successful and safe journey ahead.
- Day 4 : Trek from Namche Bazaar to Phorse
Overview
- Trek Distance: Approximately 8-9 km (5-6 miles)
- Trek Duration: 5-6 hours
- Starting Elevation: Namche Bazaar (3,440 m / 11,286 ft)
- Ending Elevation: Phorse Village (3,810 m / 12,500 ft)
- Difficulty Level: Moderate to Challenging (due to some steep ascents)
The trek from Namche Bazaar to Phorse Village is part of the Gokyo Lakes Trek route, taking you off the main Everest Base Camp trail and leading you through quieter paths, traditional Sherpa villages, and beautiful rhododendron forests. This part of the trek offers stunning views of the Himalayan peaks, including Ama Dablam, Thamserku, and Taboche.
Trek Details
1. Departing from Namche Bazaar
- After breakfast, you’ll leave the bustling town of Namche Bazaar, ascending a gradual trail that offers stunning views of Mount Everest, Lhotse, Ama Dablam, and Thamserku.
- As you leave Namche, the trail becomes quieter, with fewer trekkers, as most people on the classic Everest Base Camp trek head in a different direction.
2. Ascending to Mong La Pass (3,975 m / 13,041 ft)
- Trail Description: The trail begins with a steep climb towards Mong La, a small settlement situated on a ridge. This part of the trek is a bit challenging due to the steep ascent, but the panoramic views of the surrounding mountains make the effort worthwhile.
- Mong La Pass: Once you reach Mong La, you can take a well-deserved break to soak in the breathtaking views of Ama Dablam and other peaks. This is a great place to stop for tea or snacks before descending towards the Dudh Koshi River.
3. Descending to Phortse Tenga (3,680 m / 12,073 ft)
- After reaching Mong La, you’ll begin a descent through beautiful rhododendron forests toward Phortse Tenga, a small settlement situated near the Dudh Koshi River. This section of the trail offers shaded paths and scenic beauty, especially during the spring when the rhododendrons are in full bloom.
4. Crossing the Dudh Koshi River
- Once you reach Phortse Tenga, you’ll cross a small bridge over the Dudh Koshi River. The river’s turquoise waters and surrounding forests create a serene and peaceful atmosphere, offering a brief respite before the next ascent.
5. Ascending to Phorse Village
- Trail Description: From Phortse Tenga, you’ll begin another ascent toward Phorse Village, which is a traditional Sherpa settlement perched on the hillside. This ascent is moderately challenging but offers incredible views along the way.
- Wildlife Spotting: Keep an eye out for wildlife, as this area is part of the Sagarmatha National Park. You may spot the elusive musk deer, Himalayan tahr, or even Danphe pheasants, the national bird of Nepal.
6. Arrival in Phorse Village
- Phorse is a quiet, less-visited village, providing trekkers with a more authentic Sherpa experience compared to the busier towns like Namche or Tengboche. The village is home to traditional stone houses, terraced fields, and breathtaking views of the surrounding peaks.
- Accommodation: You’ll stay in a teahouse or lodge in Phorse. These accommodations are basic but comfortable, offering simple meals and stunning views of the mountains.
Highlights of the Day
- Mountain Views: The trail offers spectacular views of Ama Dablam, Thamserku, and Taboche throughout the day. The vantage points from Mong La and Phorse are particularly impressive.
- Traditional Sherpa Village: Phorse is a more remote Sherpa village, allowing you to experience the traditional Sherpa lifestyle and hospitality away from the main trekking crowds.
- Wildlife and Nature: Trekking through rhododendron forests and along the Dudh Koshi River provides an opportunity to see the unique flora and fauna of the Everest region.
Challenges
- Steep Ascents: The climb up to Mong La and then to Phorse can be challenging, especially at higher altitudes. However, the breathtaking scenery makes it worth the effort.
- Altitude Gain: Although this day’s elevation gain isn’t dramatic, the altitude at Phorse (3,810 m) means that you may start feeling the effects of thinner air. Keep a steady pace and stay hydrated.
Tips for the Day
- Pace Yourself: The ascents can be tough, so take your time and stop for breaks when needed. The goal is to avoid overexertion as you ascend to higher altitudes.
- Hydrate Well: Drink plenty of water to help with acclimatization and prevent altitude sickness.
- Take in the Views: Stop occasionally to enjoy the panoramic views, especially at Mong La and on the approach to Phorse. These are some of the best vantage points on the trek.
- Layer Your Clothing: The weather can change quickly, especially at higher altitudes. Dress in layers so you can adjust as you ascend or descend.
The trek from Namche Bazaar to Phorse takes you deeper into the Everest region, offering stunning mountain views, rich Sherpa culture, and the tranquility of less-traveled paths. With challenging ascents, peaceful nature walks, and the welcoming village of Phorse awaiting you, this leg of the journey is both rewarding and enriching. The quieter trails and authentic experience make it a highlight for those venturing off the standard trekking routes.
- Day 5 : Trek from Phorse Village to Machhermo
Overview
- Trek Distance: Approximately 10-11 km (6-7 miles)
- Trek Duration: 5-6 hours
- Starting Elevation: Phorse Village (3,810 m / 12,500 ft)
- Ending Elevation: Machhermo (4,470 m / 14,665 ft)
- Difficulty Level: Moderate to Challenging (due to altitude and steep sections)
This stage of the Gokyo Lakes Trek leads you from Phorse Village to Machhermo, following a less crowded but scenic route along the Dudh Koshi River and through the heart of the Khumbu region. The trail offers dramatic views of the surrounding peaks and takes you through a series of smaller Sherpa villages before arriving at Machhermo, an important acclimatization stop before ascending to Gokyo.
Trek Details
1. Departing from Phorse Village
- After breakfast, you’ll start your trek leaving Phorse, a peaceful Sherpa village known for its traditional lifestyle and picturesque mountain views.
- The trail starts with a gradual ascent, giving you panoramic views of Kangtega and Thamserku, two iconic peaks of the Everest region.
2. Trekking Along the Dudh Koshi River
- The trail follows the west bank of the Dudh Koshi River, and as you continue, the valley opens up, revealing stunning landscapes.
- The path is relatively easy at the beginning, with gentle ups and downs, passing through rhododendron forests, which are especially beautiful during springtime when the flowers bloom in vibrant colors.
3. Passing through Dole (4,200 m / 13,780 ft)
- Dole is a small settlement and a popular stop for trekkers on the way to Gokyo. The trail becomes steeper as you approach Dole, but the views of the towering peaks make it a rewarding climb.
- You can take a short break here to refuel and hydrate. The elevation gain is noticeable, so it’s essential to pace yourself and listen to your body.
4. Climbing through Alpine Meadows
- After leaving Dole, the trail climbs steadily through alpine meadows. The landscape changes dramatically as you gain altitude, with fewer trees and more open, grassy areas.
- You may spot yak caravans and herds grazing in the high pastures, a common sight in this region.
- The trail offers incredible views of the Cho Oyu (the 6th highest mountain in the world), adding to the beauty of the trek.
5. Passing through Luza (4,360 m / 14,300 ft)
- Luza is another small settlement you will pass through on your way to Machhermo. It’s quieter and less visited compared to other villages in the Khumbu region, allowing for a more serene trekking experience.
- From here, the trail continues to climb gently, offering more spectacular views of the mountains and the valley below.
6. Arrival at Machhermo
- After several hours of trekking, you’ll reach Machhermo, a picturesque village nestled at the base of towering peaks.
- Machhermo is a key acclimatization stop, as it sits at 4,470 meters, making it crucial to rest here before pushing further towards Gokyo.
Highlights of the Day
- Stunning Mountain Views: Throughout the day, you’ll be treated to views of Kangtega, Thamserku, Cho Oyu, and other Himalayan giants.
- Rhododendron Forests and Alpine Meadows: As you ascend, the landscape transitions from lush forests to open alpine meadows, providing variety in the scenery.
- Yak Herds and Sherpa Culture: You’ll pass through small villages and alpine pastures where yaks graze, offering insight into the traditional Sherpa lifestyle.
Challenges
- Altitude Gain: The trek involves a significant gain in altitude, and you will likely feel the effects of the thin air. It’s important to go slow, stay hydrated, and take frequent breaks to prevent altitude sickness.
- Steep Ascents: The trail involves several steep climbs, particularly around Dole and Luza. While the terrain is not too technical, the altitude and incline can make it more challenging.
Acclimatization and Health Tips
- Stay Hydrated: Drink plenty of water throughout the day to help your body adjust to the altitude.
- Pace Yourself: Take it slow, especially during the steeper sections of the trek. Overexertion can increase the risk of altitude sickness.
- Avoid Alcohol: Refrain from consuming alcohol, as it can dehydrate you and interfere with the acclimatization process.
- Monitor for Altitude Sickness: Be mindful of any symptoms of altitude sickness (e.g., headache, nausea, shortness of breath). If you feel unwell, inform your guide immediately.
Acclimatization in Machhermo
Machhermo is a key acclimatization point on the Gokyo Lakes Trek. You’ll spend the night here, allowing your body to adjust before ascending to higher altitudes the next day. Many trekkers use this time to relax, explore the village, or attend a briefing at the local Himalayan Rescue Association (HRA) clinic, which offers information on altitude sickness and how to stay safe at high altitudes.
The trek from Phorse Village to Machhermo is a rewarding and scenic journey through less-traveled paths, offering incredible views of the Himalayan peaks, lush forests, and serene Sherpa villages. The gradual ascent provides a perfect opportunity to acclimatize before pushing on to higher elevations. With stunning vistas, peaceful trails, and the charm of remote villages, this day is both a challenge and a delight for trekkers heading towards Gokyo Lakes.
- Day 6 :Trek from Machharmo to Gokyo
Overview
- Trek Distance: Approximately 7-8 km (4-5 miles)
- Trek Duration: 4-5 hours
- Starting Elevation: Machhermo (4,470 m / 14,665 ft)
- Ending Elevation: Gokyo (4,790 m / 15,715 ft)
- Difficulty Level: Moderate (shorter distance but at high altitude)
This leg of the Gokyo Lakes Trek takes you from the tranquil village of Machhermo to the stunning lakeside settlement of Gokyo, located next to the turquoise Gokyo Lakes. The trail offers breathtaking views of the surrounding Himalayan peaks, including Cho Oyu, as you gradually ascend through the rugged high-altitude landscape. Gokyo serves as the gateway to some of the most awe-inspiring scenery in the Everest region.
Trek Details:
1. Departing from Machhermo
- After breakfast in Machhermo, you’ll start your trek towards Gokyo. The trail begins with a gentle ascent as you leave the village, passing through the arid alpine landscape typical of higher altitudes.
- The morning views of Kangtega, Thamserku, and Cho Oyu are striking as the sun rises over the snow-capped peaks.
2. Ascending the Valley
- The trail follows the Dudh Koshi River upstream, and you’ll soon notice that the terrain becomes more rugged and barren as you approach the high-altitude desert environment.
- The path is mostly gradual with a few steeper sections as you ascend through the moraine-dotted valley, surrounded by towering peaks on all sides.
3. Crossing the Ngozumpa Glacier
- One of the highlights of the day is crossing the Ngozumpa Glacier, the largest glacier in the Himalayas. The glacier’s surface is a dramatic expanse of ice and debris, providing a unique and otherworldly trekking experience.
- The crossing is generally safe and well-marked but can be a bit challenging due to the uneven terrain. It’s essential to watch your step as you traverse the rocky moraines.
4. Arrival at First and Second Gokyo Lakes
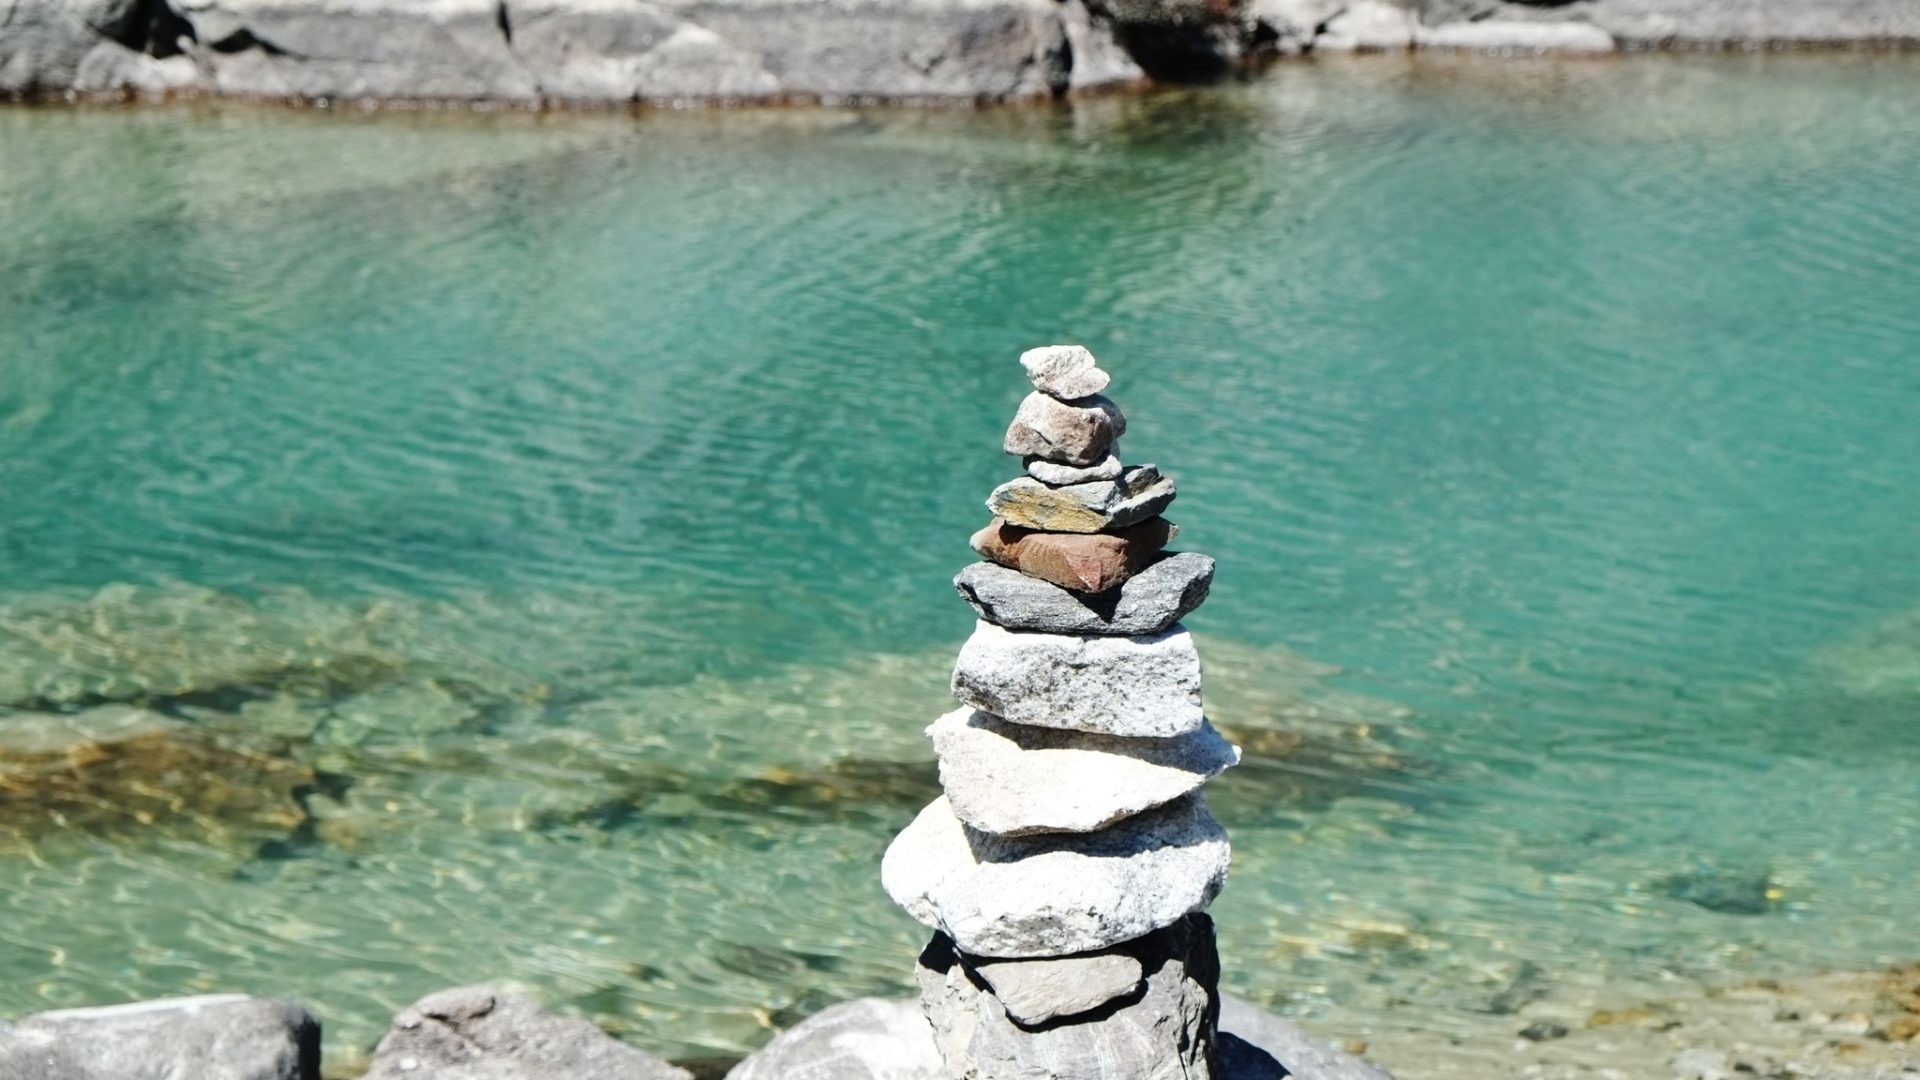
- After crossing the glacier, you’ll reach the first of the Gokyo Lakes, a shimmering blue-green body of water known as Longpongo (4,690 m / 15,383 ft). The sight of these pristine glacial lakes, with their vibrant turquoise color, is one of the highlights of the trek.
- A little further on, you’ll pass the second lake, Taujung Tsho, before making your way to the third lake.
5. Reaching Gokyo and the Third Gokyo Lake (Dudh Pokhari)
- The third lake, Dudh Pokhari, marks your arrival at Gokyo Village. The village is situated on the shores of this stunning glacial lake, with the snow-covered peaks of Cho Oyu (8,188 m / 26,864 ft) towering in the background.
- Gokyo is a small settlement primarily catering to trekkers, offering basic teahouses and lodges. The setting is serene, with the turquoise lake reflecting the surrounding peaks.
Highlights of the Day
- Gokyo Lakes: The turquoise-blue glacial lakes are a mesmerizing sight, especially when contrasted against the stark, rocky landscape. The beauty of the third lake, Dudh Pokhari, is particularly breathtaking.
- Ngozumpa Glacier: Crossing the largest glacier in the Himalayas offers a dramatic and unforgettable trekking experience.
- Mountain Views: The day’s trek provides some of the best views of Cho Oyu and other towering peaks like Cholatse and Taboche.
Challenges
- High Altitude: You’ll be trekking above 4,500 meters for the entire day, with the elevation increasing as you reach Gokyo. Be mindful of altitude sickness and take it slow to ensure proper acclimatization.
- Glacier Crossing: The terrain on the Ngozumpa Glacier can be tricky to navigate due to the loose rocks and uneven surface. Take your time and watch your step.
Tips for the Day
- Stay Hydrated: Drink plenty of water to help your body cope with the high altitude.
- Pace Yourself: Since the trek is at high altitude, take it slow to avoid overexertion and allow for acclimatization.
- Layer Your Clothing: The weather can change quickly at these altitudes, so be prepared to adjust your clothing to stay warm, especially when crossing the glacier.
- Enjoy the Views: The trek offers some of the most stunning scenery in the Himalayas, so take time to pause and appreciate the dramatic landscapes.
Gokyo Village and Acclimatization
- Once you arrive at Gokyo Village, you’ll likely spend the rest of the day resting and acclimatizing before any further ascents. The village is an excellent base for exploring the surrounding area, including Gokyo Ri (5,357 m / 17,575 ft) and the fourth and fifth Gokyo Lakes, which are often visited the next day.
- Gokyo Ri offers a stunning panoramic view of the Everest, Makalu, Lhotse, and Cho Oyu massifs, along with the mesmerizing Gokyo Lakes below.
The trek from Machhermo to Gokyo is one of the most scenic parts of the Gokyo Lakes Trek, offering spectacular views of the Himalayas, Gokyo Lakes, and the massive Ngozumpa Glacier. With its high-altitude beauty and relatively moderate trekking distance, this day’s journey will leave you in awe of the remote and pristine landscapes of the Everest region. Upon reaching Gokyo, you’ll be rewarded with the serenity of the glacial lakes and the towering Himalayan peaks surrounding the village, making it a perfect spot for rest and exploration.
- Day 7 : Trek from Gokyo Valley; Climb Gokyo Ri & Hike to Fifth Lake
Overview
- Gokyo Ri Climb
- Elevation: Gokyo Village (4,790 m / 15,715 ft) to Gokyo Ri (5,357 m / 17,575 ft)
- Duration: 3-4 hours (round trip)
- Difficulty: Challenging (due to steep ascent and high altitude)
- Hike to Fifth Lake (Ngozumba Tsho)
- Elevation: Fifth Lake (5,160 m / 16,930 ft)
- Duration: 4-5 hours (round trip)
- Difficulty: Moderate (relatively flat but long distance at high altitude)
This day involves a challenging but rewarding climb to Gokyo Ri, offering some of the most stunning panoramic views in the entire Everest region, followed by a serene and beautiful hike to the remote Fifth Gokyo Lake. Both activities make this day a true highlight of the Gokyo Valley trek, combining the exhilaration of a peak ascent with the tranquility of the lesser-visited glacial lakes.
Gokyo Ri Climb
1. Early Morning Star
- You’ll begin the day before sunrise to take advantage of the best conditions for climbing Gokyo Ri and to catch the breathtaking sunrise over the Himalayan giants.
- The climb is steep but well-marked, with a zigzagging trail that rises sharply above Gokyo Village.
2. Ascending to Gokyo Ri
- The ascent to Gokyo Ri is about 600 meters (1,970 feet) from Gokyo Village and takes around 2 to 2.5 hours. Though the distance is not long, the steep incline and high altitude make this a physically demanding climb.
- The higher you climb, the more spectacular the views become. You’ll see the full Gokyo Lakes spread out below, the shimmering blue water contrasting with the rugged mountain landscape.
- As you near the top, panoramic views of some of the world’s highest peaks – including Mount Everest (8,848 m), Lhotse (8,516 m), Makalu (8,485 m), and Cho Oyu (8,188 m) – dominate the horizon.
3. Reaching the Summit of Gokyo Ri
- Upon reaching the summit of Gokyo Ri (5,357 m), you’ll be rewarded with one of the most spectacular viewpoints in the Himalayas. The 360-degree panorama includes Everest, the Ngozumpa Glacier, the Gokyo Lakes, and a host of other peaks.
- After spending some time at the top to rest, take photos, and enjoy the view, you’ll descend back to Gokyo Village for breakfast.
Hike to Fifth Gokyo Lake (Ngozumba Tsho)
1. Departing from Gokyo Village
- After resting and refueling at Gokyo Village, the second part of the day takes you on a relatively flat hike towards the fourth and fifth Gokyo Lakes.
- The trail follows the moraine of the Ngozumpa Glacier, providing excellent views of the glacier and surrounding peaks.
2. Passing the Fourth Gokyo Lake (Thonak Tsho
- After about 2 hours of trekking, you’ll reach the fourth Gokyo Lake (Thonak Tsho). This lake is less visited but equally stunning, with its deep blue waters reflecting the surrounding mountains.
- You can take a short break here before continuing on towards the fifth lake.
3. Reaching the Fifth Gokyo Lake (Ngozumba Tsho
- The hike continues along a rocky path until you reach the remote and pristine Fifth Gokyo Lake (Ngozumba Tsho). This lake sits at an elevation of 5,160 meters (16,930 feet) and is surrounded by towering peaks, making it a truly awe-inspiring destination.
- From here, you can get a distant view of the Everest group of mountains, as well as the vast expanse of the Ngozumpa Glacier. There’s also a viewpoint near the fifth lake known as Scoundrel’s Viewpoint, which offers a unique vantage point of Mount Everest.
4. Return to Gokyo Village
- After spending time at the fifth lake and enjoying the peaceful surroundings, you’ll begin your return hike back to Gokyo Village. The entire hike to the fifth lake and back takes around 4 to 5 hours, depending on your pace and how long you spend at the lakes.
- Upon returning, you can relax and enjoy a well-deserved meal at your lodge.
Highlights of the Day
- Panoramic Views from Gokyo Ri: Standing at 5,357 meters, Gokyo Ri offers one of the best views in the Everest region, with a sweeping panorama of the Himalayas, including Everest, Lhotse, Makalu, Cho Oyu, and the stunning Gokyo Lakes below.
- Gokyo Lakes: Hiking to the lesser-visited Fourth and Fifth Gokyo Lakes provides a tranquil experience amidst the majestic Himalayan landscape.
- Ngozumpa Glacier: The views of the vast Ngozumpa Glacier, the longest glacier in the Himalayas, are both impressive and humbling.
- Scoundrel’s Viewpoint: Near the Fifth Lake, this viewpoint offers additional vistas of Everest and its surrounding peaks.
Challenges
- Steep Ascent to Gokyo Ri: The climb is physically demanding due to the steep incline and high altitude. However, the views from the top make it well worth the effort.
- High Altitude: You’ll be trekking at over 4,700 meters throughout the day, so it’s essential to monitor yourself for signs of altitude sickness. Hydrate well and take it slow.
- Cold Temperatures: The weather can be very cold, especially early in the morning during the Gokyo Ri ascent, so ensure you’re adequately layered and prepared.
Tips for the Day
- Start Early for Gokyo Ri: The best views and lighting are in the early morning, plus starting early will help you avoid afternoon clouds that can obscure the view.
- Dress in Layers: The temperature will fluctuate throughout the day, so dress in layers to stay comfortable, especially during the Gokyo Ri climb.
- Bring Snacks and Water: Since the day involves two challenging activities, make sure you have enough energy by bringing snacks and water with you.
- Pace Yourself: The altitude makes both the climb and the hike more demanding, so go at a pace that’s comfortable for you, especially on the steep Gokyo Ri trail.
This day in the Gokyo Valley is packed with adventure and jaw-dropping scenery. Starting with a challenging yet rewarding climb up Gokyo Ri, you’ll be treated to some of the best panoramic views in the Everest region. After descending, the hike to the fourth and fifth Gokyo Lakes offers a peaceful exploration of these remote, glacial lakes with fewer trekkers around. The combination of stunning vistas, glacial landscapes, and high-altitude lakes makes this one of the most memorable days on the Gokyo Lakes Trek.
- Day 8 : Trek from Gokyo to Dole
Overview
- Starting Elevation: Gokyo (4,790 m / 15,715 ft)
- Ending Elevation: Dole (4,038 m / 13,248 ft)
- Trek Distance: Approximately 11 km (6.8 miles)
- Trek Duration: 5-6 hours
- Difficulty: Moderate (descending but still at high altitude
The trek from Gokyo to Dole marks the beginning of your descent after exploring the high-altitude Gokyo Valley. This stage is a moderate trek with a mixture of downhill and some flat sections, allowing you to enjoy beautiful views of the mountains, glacial rivers, and the vibrant rhododendron forests as you gradually descend into the more vegetated areas of the Khumbu region.
Trek Details
1. Departing from Gokyo
- After breakfast in Gokyo Village, you’ll start the trek by retracing your steps along the moraine of the Ngozumpa Glacier.
- The descent offers excellent views of Cho Oyu, the towering peak that dominates the Gokyo Valley. The path is gradual at first, with stunning views of the surrounding peaks and lakes as you walk downhill.
2. Trekking Back through Machhermo
- You’ll pass through the villages of Machhermo (4,470 m) and Luza, where you can stop for a short break or refreshments. These villages are quiet and offer peaceful surroundings, with the path running parallel to the Dudh Koshi River.
- The descent continues gently, and as you get lower, you’ll notice the landscape becoming greener, with more plant life and trees compared to the high-altitude desert environment near Gokyo.
3. Passing Through Lush Valleys
- As you descend further, you’ll re-enter the lush valleys filled with juniper and rhododendron forests. During spring, these forests are filled with colorful rhododendron blossoms, adding a vibrant touch to the otherwise stark landscape.
- The trail also offers fantastic views of Taboche, Cholatse, and other nearby peaks as you head down toward the lower altitude.
4. Arrival in Dole
- After around 5-6 hours of trekking, you’ll arrive in Dole, a small but picturesque village situated at an elevation of 4,038 meters.
- Dole offers basic lodges and guesthouses, providing a cozy stopover after a long day of trekking. The village is located in a beautiful setting, surrounded by alpine meadows and forests, with impressive mountain views on clear days.
Highlights of the Day
- Ngozumpa Glacier: The descent from Gokyo provides one last look at the dramatic Ngozumpa Glacier, the longest in the Himalayas.
- Mountain Views: Enjoy stunning vistas of Cho Oyu, Cholatse, Taboche, and other peaks as you descend from Gokyo.
- Machhermo Valley: Passing through Machhermo and the surrounding area, you’ll experience the beautiful transition from the barren high-altitude environment to lush, green valleys.
- Rhododendron Forests: The descent takes you through vibrant rhododendron forests, especially beautiful during the blooming season (March to May).
Challenges
- High Altitude: While you’re descending, you’re still trekking at altitudes above 4,000 meters, so it’s important to pace yourself and stay hydrated.
- Rocky and Steep Sections: Some parts of the trail, especially near the moraine, can be rocky and uneven, so watch your footing.
Tips for the Day
- Trekking Poles: As you’ll be descending, trekking poles can help reduce strain on your knees and improve stability.
- Hydration: Even though you’re descending, you’re still at high altitude, so continue to hydrate well.
- Layer Your Clothing: The temperature will rise as you descend, so be prepared to remove layers when it gets warmer, especially in the lower valleys.
- Take Breaks: Enjoy the beautiful scenery along the way and take frequent breaks to appreciate the changing landscape.
The trek from Gokyo to Dole is a moderate, scenic descent, providing a mix of breathtaking mountain views, glacier vistas, and lush valley scenery. As you leave the high-altitude Gokyo region behind, you’ll notice the gradual change in the landscape, with more greenery and vegetation as you approach Dole. It’s a rewarding day of trekking, offering a peaceful and beautiful journey through the heart of the Khumbu region.
- Day 9 : Trek from Dole to Namche Bazaar
Overview
- Starting Elevation: Dole (4,038 m / 13,248 ft)
- Ending Elevation: Namche Bazaar (3,440 m / 11,286 ft)
- Trek Distance: Approximately 11 km (6.8 miles)
- Trek Duration: 5-6 hours
- Difficulty: Moderate (mostly descending with some uphill sections)
The trek from Dole to Namche Bazaar involves a scenic descent through alpine meadows and dense forests, passing traditional Sherpa villages, and offering picturesque views of the surrounding Himalayan peaks. As you lose altitude, the air becomes warmer, and the vegetation becomes more lush and vibrant, signaling your return to lower elevations in the Khumbu region.
Trek Details
1. Departing from Dole
- After breakfast, you’ll begin your trek by descending through the beautiful alpine valleys surrounding Dole. The trail drops gradually at first, providing fantastic views of peaks like Taboche and Cholatse.
- The trail leads through verdant forests of rhododendrons, juniper, and conifers, which are particularly beautiful if you’re trekking in spring when the rhododendrons are in full bloom.
2. Descending to Phortse Thenga
- The trail descends steeply to Phortse Thenga, a small settlement on the banks of the Dudh Koshi River. This section of the trek is filled with tall pine trees and offers peaceful walking through quiet forested areas.
- Phortse Thenga is a common stop for a short rest before continuing the trek.
3. Ascend to Mong La (3,975 m)
- After crossing the river at Phortse Thenga, the trail climbs uphill to the Mong La Pass (3,975 m). This is a moderately steep climb, but it rewards you with incredible views of Ama Dablam, Thamserku, and the valley below.
- Mong La is a great place to stop for tea or snacks while enjoying panoramic views of the surrounding peaks.
4. Descending Towards Kyangjuma
- After resting at Mong La, you’ll begin descending again towards Kyangjuma, passing through more beautiful rhododendron forests and small Sherpa settlements along the way.
- The trail is a mix of gentle downhill and flat sections, offering fantastic views of Mount Everest, Lhotse, and Ama Dablam as you get closer to Namche.
5. Final Stretch to Namche Bazaar
- From Kyangjuma, the trail follows a mostly gradual descent with some short uphill sections as you approach Namche Bazaar.
- You’ll pass by a few small villages before reaching the bustling town of Namche Bazaar, which feels like a return to civilization after days of trekking in remote areas.
Highlights of the Day
- Mong La Pass: The climb to Mong La offers stunning panoramic views of Ama Dablam and other famous peaks.
- Forest Scenery: As you descend, the trail passes through dense forests of pine and rhododendron, with a chance to spot wildlife like Himalayan Tahr and pheasants.
- Sherpa Villages: You’ll pass through several traditional Sherpa villages, offering insight into local culture and the way of life in the mountains.
- Return to Namche: Arriving in Namche Bazaar feels rewarding after days of trekking in higher altitudes. Namche offers a range of amenities, including cafes, shops, and bakeries, perfect for unwinding after your trek.
Challenges
- Uphill to Mong La: The climb to Mong La is moderately challenging, especially after a morning of descent. Take your time and enjoy the views during the ascent.
- Long Descent: Though most of the trek is downhill, the continuous descent can be hard on your knees, so it’s important to pace yourself and use trekking poles if necessary.
Tips for the Day
- Trekking Poles: As much of the day involves descending, trekking poles can help reduce the strain on your knees and improve balance on uneven terrain.
- Take Breaks: Enjoy the beautiful scenery along the way and take breaks, especially at Mong La to enjoy the views and recharge.
- Hydration: Even though you’re descending, staying hydrated is key to maintaining your energy levels, especially after days of high-altitude trekking.
- Explore Namche: Once back in Namche, take the opportunity to explore the town, visit local shops, or relax at a café before continuing your trek the next day.
The trek from Dole to Namche Bazaar is a rewarding day, offering a mix of beautiful forest scenery, panoramic mountain views, and cultural experiences as you pass through traditional Sherpa villages. The combination of descending through lush valleys and climbing to scenic passes like Mong La makes this day of trekking both varied and enjoyable. Ending the day in the bustling town of Namche Bazaar provides a comfortable rest stop after days of trekking in more remote areas.
- Day 10 : Trek from Namche Bazaar to Lukla
Overview
- Starting Elevation: Namche Bazaar (3,440 m / 11,286 ft)
- Ending Elevation: Lukla (2,860 m / 9,383 ft)
- Trek Distance: Approximately 18 km (11 miles)
- Trek Duration: 6-7 hours
- Difficulty: Moderate (long descent with some uphill sections)
The final day of trekking from Namche Bazaar to Lukla marks the completion of your adventure in the Everest region. This leg of the trek is mostly downhill but includes a few steep climbs, particularly before reaching Lukla. The trail leads through beautiful landscapes, lush forests, and Sherpa villages, offering a fitting end to your journey.
Trek Details
1. Departing from Namche Bazaar
- After an early breakfast, you’ll begin the day by leaving the lively town of Namche Bazaar behind and start descending.
- The initial descent is steep and can be tough on the knees, so trekking poles are recommended. This section of the trail drops sharply down to the Dudh Koshi River, with fantastic views of Mount Everest, Lhotse, and Ama Dablam along the way.
2. Crossing Suspension Bridges
- The trail passes through dense pine and rhododendron forests, crossing the Hillary Suspension Bridge and several other smaller suspension bridges over the Dudh Koshi River.
- The bridges are highlights of the day, as they offer thrilling crossings with dramatic views of the rushing river below.
3. Passing Through Monjo and Phakding
- You’ll pass through the village of Monjo, where the Sagarmatha National Park checkpoint is located, and continue descending toward Phakding (2,610 m). Phakding is a common stop for trekkers on the way up and down, and it’s a good place to take a break or have lunch.
- From Phakding, the trail becomes a mix of gentle ascents and descents, following the Dudh Koshi River upstream.
4. Final Stretch to Lukla
- The last few hours of the trek take you through small villages like Toktok, Chheplung, and Ghat, where you can interact with locals and see traditional stone-built houses and Buddhist prayer wheels.
- As you near Lukla, the trail becomes steeper in some sections. While it can be tiring after a long day, the excitement of completing your trek will carry you through.
5. Arrival in Lukla
- After approximately 6-7 hours of trekking, you’ll arrive in Lukla, where your adventure began. The village feels bustling, with trekkers preparing for or celebrating the end of their journeys.
- Once in Lukla, you’ll check into your lodge and have the opportunity to relax, reflect, and enjoy your final evening in the mountains. Many trekkers gather to celebrate the completion of the trek with their guides and fellow adventurers.
Highlights of the Day
- Hillary Suspension Bridge: Crossing this iconic bridge one last time, with breathtaking views of the Dudh Koshi River and surrounding landscapes.
- Rhododendron and Pine Forests: Walking through dense forests filled with vibrant rhododendrons and towering pines as you descend toward lower altitudes.
- Sherpa Villages: Passing through villages like Monjo, Phakding, and Ghat, where you can observe daily life and Sherpa culture.
- Lukla: The final stop on your trek, where the feeling of accomplishment sets in as you return to the village and prepare for your flight back to Kathmandu.
Challenges
- Steep Descent: The initial descent from Namche Bazaar is steep and can be hard on the knees. Trekking poles and good pacing will help you navigate this section comfortably.
- Long Day: This is a long day of trekking, and though much of it is downhill, the cumulative hours can be tiring. Take breaks as needed and pace yourself to avoid exhaustion.
- Altitude Change: Although you’re descending, the physical effort of the day and some short uphill sections can still be challenging after several days of trekking.
Tips for the Day
- Use Trekking Poles: To reduce strain on your knees, especially during the steep descent from Namche.
- Take Breaks: Stop at Monjo or Phakding for a rest or snacks, especially after the descent from Namche.
- Celebrate in Lukla: Once in Lukla, enjoy the sense of accomplishment and consider joining your guide and fellow trekkers for a celebratory drink or meal.
- Prepare for Your Flight: Check your flight details with your guide or the lodge to ensure you’re ready for your flight back to Kathmandu the following day.
The trek from Namche Bazaar to Lukla is a rewarding conclusion to your Everest adventure. You’ll experience a mix of steep descents, lush forests, Sherpa villages, and suspension bridges as you make your way back to where your journey began. The final arrival in Lukla marks the completion of your trekking experience, where you can reflect on your achievement and celebrate with your fellow trekkers and guides before flying back to Kathmandu.
- Day 11 : Fly back to Kathmandu
Overview
After an incredible journey through the Gokyo Valley, your trek concludes with a scenic flight back to Kathmandu from Lukla. This flight is not only a convenient way to return to the capital but also offers breathtaking aerial views of the Himalayas.
1. Departure from Gokyo
- After breakfast, you’ll begin your descent back to Lukla. Depending on your itinerary, you may trek from Gokyo to Dole or Machhermo, then continue toward Lukla.
- The trek back will take about 4-6 hours, depending on your chosen route and pace.
2. Arriving in Lukla
- Once you reach Lukla, you’ll have some time to rest, grab a meal, and prepare for your flight back to Kathmandu.
- It’s advisable to check in with your airline or trekking agency regarding the status of your flight, as weather conditions can affect flight schedules.
3. Flight from Lukla to Kathmandu
- Duration: The flight typically takes about 30-40 minutes.
- Scenic Views: As you ascend, keep your camera ready for stunning aerial views of the Himalayas, including Mount Everest, Lhotse, Nuptse, and other peaks. The flight path offers an unforgettable perspective of the rugged terrain you’ve just trekked through.
4. Arrival in Kathmandu
- Once you arrive at Tribhuvan International Airport in Kathmandu, you’ll disembark and proceed through immigration and customs.
- From the airport, you can arrange for transportation to your hotel or any further activities in Kathmandu.
Tips for the Flight
- Early Start: Flights to Kathmandu often depart early in the morning. Ensure you are ready and at the airport on time.
- Weather Considerations: Flights can be delayed or canceled due to weather conditions in the mountains. Be prepared for possible delays and have a flexible itinerary.
- Baggage Limit: Be aware of the luggage weight limits set by the airlines. It’s usually around 15 kg for checked luggage and 5 kg for cabin baggage.
Flying back to Kathmandu after your Gokyo Lake Trek marks the end of an incredible journey. Take some time to reflect on your experiences, share stories with fellow trekkers, and consider exploring more of what Kathmandu has to offer, such as its rich culture, historical sites, and delicious cuisine. Whether you’re planning to rest, shop for souvenirs, or enjoy local delicacies, the adventure doesn’t have to end just yet!
Cost Include
- 10 nights in guesthouses/lodges in the Everest Region on a twin-sharing basis.
- Rooms with attached bathrooms in Lukla, Phakding, and Namche Bazaar.
- All meals during the trek (breakfast, lunch, dinner) with one hot drink per meal.
- Seasonal fresh fruits provided during the trek.
- An experienced, English-speaking, government-licensed trekking guide with first-aid training.
- Support from porters during the trek (1 porter for every 2 trekkers).
- All wages, insurance, accommodations, and meals for the staff (guides and porters).
- Staff will be equipped with appropriate gear, including proper clothing and safety equipment.
- Purified drinking water during the trek, provided using water filters or purification tablets.
- Trekking map, a duffel bag, sun hat, and Buff/Neck Gaiter from Ace the Himalaya.
- Trekking completion certificate at the end of the journey.
- All necessary trekking permits, including Sagarmatha National Park entry permit and TIMS (Trekkers' Information Management System) card.
- Farewell dinner at a traditional Nepali restaurant on the last night of your stay.
- All government taxes, administrative costs, and service fees
- Private room accommodation throughout the trek.
- Upgrade to a 4 or 5-star hotel in Kathmandu.
- Additional activities or cultural tours in Kathmandu before/after the trek.
This revised version ensures your package is updated, offering a balanced mix of comfort and adventure!
Cost Exclude
- Lunch and dinner while staying in Kathmandu are not included.
- Costs associated with your international airfare and airport departure tax are not part of the package.
- Any drinks, including bottled or boiled water, soft drinks, and alcohol, are excluded.
- You are required to have travel insurance that includes coverage for high-altitude trekking and emergency evacuation. This is not included in the package price.
- Tips for the trekking crew (guides, porters) and drivers are not covered and are at your discretion.
- The cost of obtaining a Nepal entry visa is not included. The visa can be secured upon arrival at Tribhuvan International Airport. The current fees are USD 50 for a 30-day visa and USD 125 for a 90-day visa.
- You are responsible for providing your own personal trekking gear, such as clothing, boots, and equipment.
- Any personal costs or expenses not explicitly mentioned in the "Inclusions" section are excluded.